
Using conditional expressions in your survey project can be a great way to increase the accuracy of your field data collection. Using QGIS expressions can be a powerful tool for improving the usability of your survey in the field. Due to the flexibility of QGIS, there are many ways that this tool can be used, but we will show a couple of examples to get you started.
Example 1 - Restricting fields with expressions
Sometimes complex survey forms can become cluttered or confusing for surveyors who are recording data on smaller device screens. One way to make your forms more straightforward is to use expressions to only show fields that the surveyor needs to access.
For example, you may be conducting a property survey that requires specific fields to be filled in depending on the type of property. Making the user have to scroll through each section of the form until they find the necessary fields can be confusing and time consuming for surveyors. Instead, you can use conditional expressions to only display fields that are required depending on the type of property being surveyed.
Let’s start with a simple example project for our property survey. We have a background map and a point layer called ‘survey’ to record the information for each property. The table for the ‘survey’ layer is as follows:
| Field | Type | Description |
|---|---|---|
| fid | INT | primary_key |
| uuid | text | Unique ID |
| surveyor | text | Field to record surveyor username |
survey_team | text | Record the survey team assigned to the property |
| created | date/time | Timestamp for when the record was created |
| last_update | date/time | Timestamp for the last time the feature was updated |
| street_no | INT | Street number |
| street_name | text | Street name |
| postal_code | text | Postal code |
| floors | INT | Number of floors |
| type | text | Type of property (business or residential) |
| bus_name | text | Name of business |
| bus_type | text | Type of business |
| res_type | text | Type of house (bungalow, terraced, cottage, etc) |
| res_parking | text | Type of parking available at the house (street, drive, garage) |
| res_occupeid | Boolean | Is the residence occupied? |
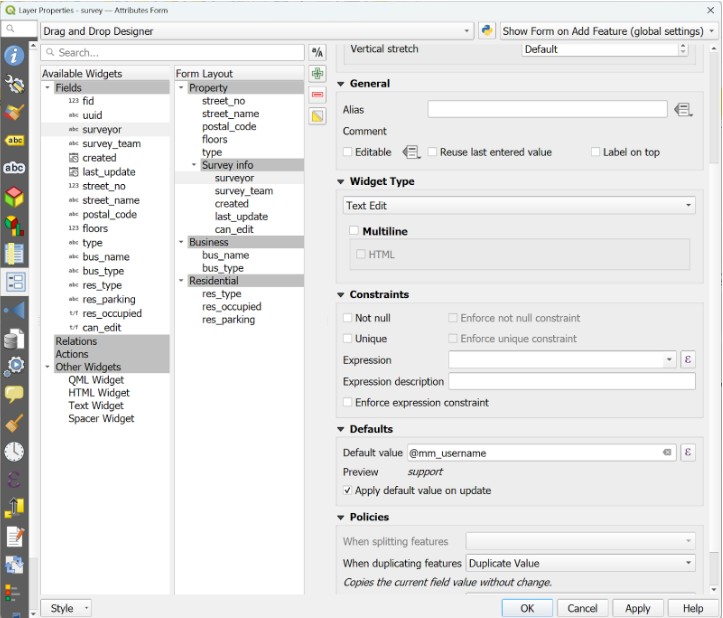
One way we can make this form easier for the surveyor to use is to organise the fields into tabs using the Drag and Drop Designer. We can organise our survey into three tabs, Property, Business and Residential with a box for the surveyor information on the first tab:

Now that the fields are organised, we can take an extra step to make the form even more responsive to user inputs. We can use an expression to hide the Business and Residential tabs until the user chooses the type of property. To do this, select the tab and use the Control Visibility by Expression field to set an expression to show or hide the tab.
For the Business tab use:
"Type" = 'business'And for the Residential tab use:
"Type" = 'residential'
Now, when the user is entering data in the field, they will only see the Property tab until they select an option for the type field, it is also a good idea to set a ‘Not null’ constraint on the type field so that the user remembers to put in a value for the property or else they may not know that there is more information to collect!
Watch the video here.
Example 2 - Restricting edits with expressions
Now that we have our survey interface improved with some expressions, we can try a more advanced method to restrict who can edit features in our project. In our example, we only want surveyors to be able to edit entries created by or assigned to their survey team.
We already have a field to record the surveyor’s username and their assigned survey team. We’ll compliment this with a nonspatial table that lists each surveyor’s username and their team, which looks like this:
| fid | INT | Primary Key |
|---|---|---|
| surveyor_id | text | UUID for surveyor record |
| username | text | Default value set to @mm_username to record the surveyors username |
| team | text | The surveyor’s assigned team, there are three teams in our example: red, blue and green |
In our survey table, the surveyor field is set as non-editable and uses a default value expression of @mm_username, and the field is set to apply the default on update.
Next we set up the survey_team field as a text widget with the following default value expression:
attribute(get_feature('surveyors','username',@mm_username), 'team')In this expression, working from the inside out, we use the get_feature() function to retrieve the feature in the surveyors table which matches the username to the current user’s @mm_username. Then we use the attribute() function to return the value of the team field for that feature. This default value is only applied once when the feature is created. We disable editing for this field, or you can use an expression to only allow an admin user to edit the feature with an expression like (replace the text in parentheses with usernames of admin users):
@mm_username IN ('list', 'of', 'admin', 'usernames')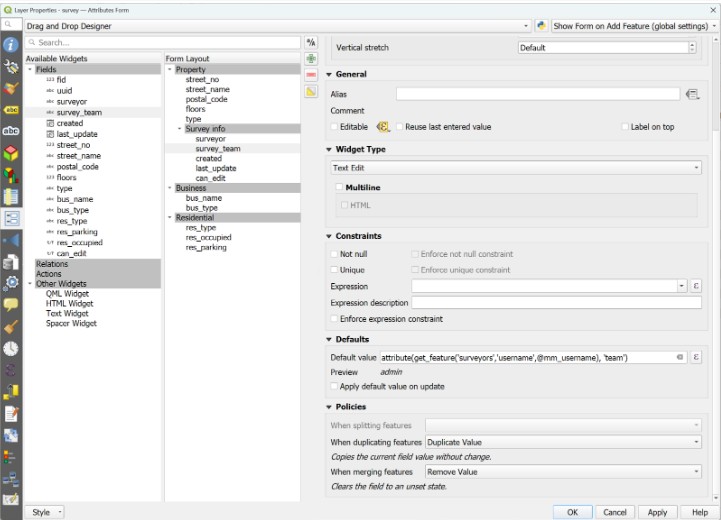
In this example, we also add a boolean field to the survey layer called can_edit, we’ll configure this field with an expression constraint that will prevent users from saving changes to a feature if they are not part of the survey team that created or is assigned to the feature.
First, we will set the default value of the can_edit field with the following expression:
attribute(get_feature('surveyors', 'username', @mm_username),'team') ILIKE "survey_team"

OR

@mm_username IN ('replace this with','admin','users')
The expression above uses the same function used for the default value in the survey_team to retrieve the current user’s team association and checks that it matches the value of the survey team that is assigned to the feature. The statement after the OR operator checks if the user is an admin user. If the current user is an admin or member of the team associated with the feature, the value of the field will be set to true, if they are not in either of those groups it will be false. Make sure the default value is set to be applied on update.
Next, we will create an expression-based constraint so that the feature can only be saved if the value of the can_edit field is true:
"can_edit" = trueFinally, make sure to disable editing on the field. Your settings should look similar to this:

Now we can see in our example, this user who is on the red survey team, can only edit features assigned to that team. See the example here.
Many more uses of conditional settings
These are just a few examples of ways you can use conditions in your project to improve the workflow and ensure data quality. The uses of conditions open your project to more customisation such as conditional symbology, time constraints, auto-filling fields based on certain values, and much more. Using the full power of QGIS will help you get the most out of your Mergin Maps project!