
Using Mergin Maps to coordinate your field work gives you a lot of flexibility in how you can share information in the field. Rules-based symbology is one of the more powerful features you can use to give your team more context when they are working in the field. This feature lets you define map symbology based on a series of user-defined rules. One common use of this type of symbology is to display information about multiple aspects of a feature on the map.
Step 1 - Setting up the layer for rule-based symbology
If you want to use rule-based symbology, it’s best to think about how you will organise your layer table to get the most out of the feature. Let’s say we are working in land management and need to assign jobs to a grounds crew. We’ll want to show symbols for different types of jobs and their priority. In order to make use of the rules-based symbology, we’ll want to make sure that the inputs for these attributes are pre-defined so we can set rules based on the possible values for these fields. The best way to do this is to use value maps or value relations with pre-defined values for users to select.
For our example project, we’ll have three attributes on the survey table that will be used for a rules-based symbology:
- job - a value relation field that is linked to a non-spatial table that contains a list of jobs

- priority - a value map widget that has a list of priority levels for the job

It is important to make sure these fields are set with enforceable ‘Not Null’ constraints to make sure our symbology will work properly.
Step 2 - Set up the rule based symbology
Next we need to set up the rules-based symbology. To do this, you will need to go to the Symbology tab on the layer settings and select ‘Rule based’ for the symbology type.

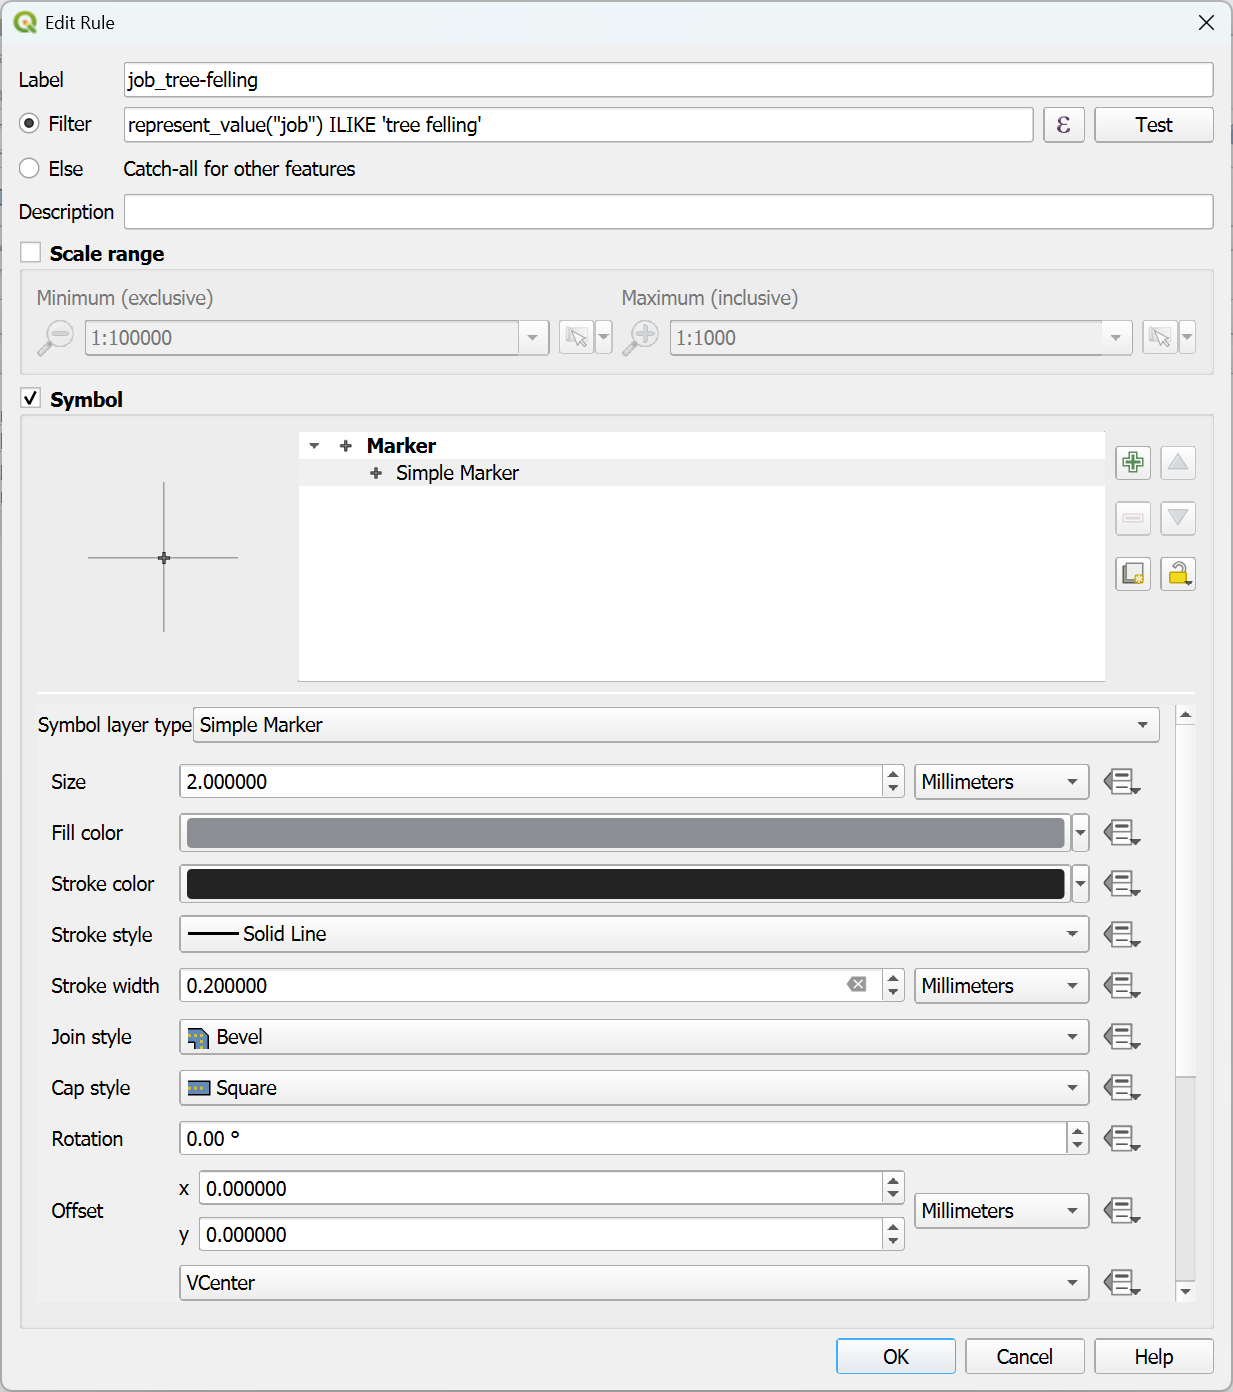
Now we need to make some rules. First we make some symbols to represent the job types using an expression filter for each job type, make sure to use the represent_value() function if the keys and values are different for your value relation widget:
represent_value(“job") ILIKE ‘<NAME_OF_JOB>’
We’ll then make a symbol for each of the job types. You can decide which method is best for your project depending on how many different categories you will have in the target field. We only have a few different job types in our example so we’ll just use a different shape from the options in the simple marker. You can also import SVG symbols to your project and use those here. For more information on this, see our previous support tip on using SVG symbols.
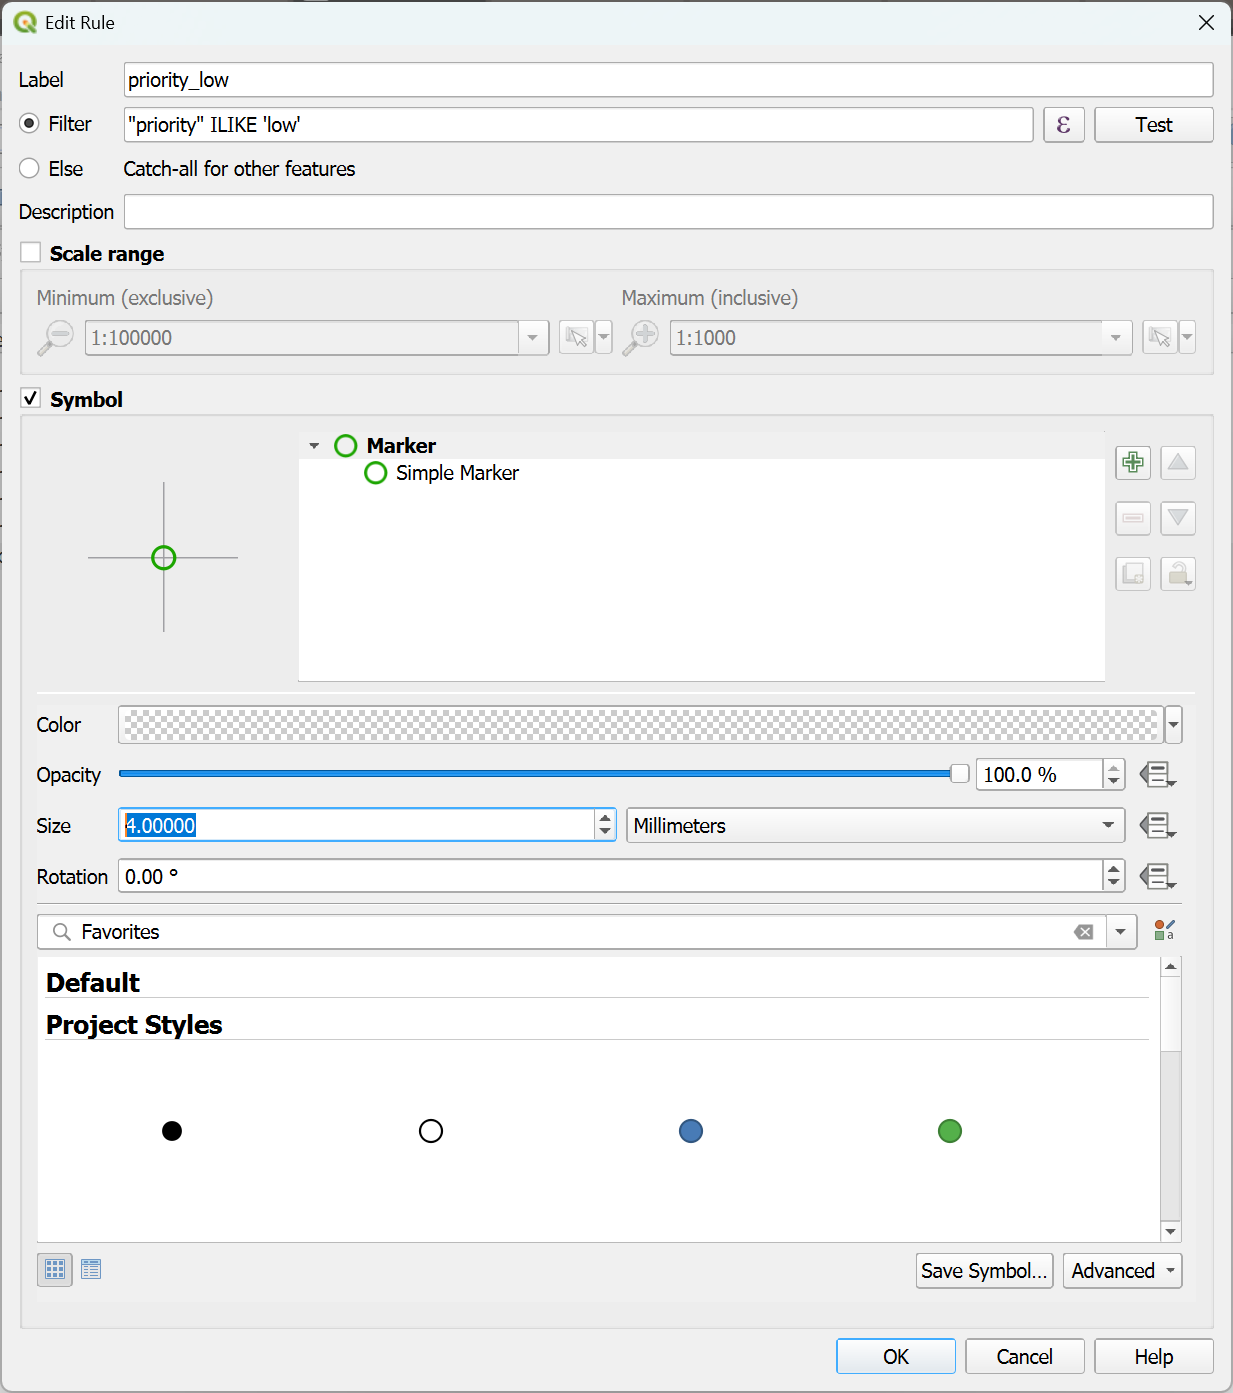
Next we’ll make a symbol for the job priority. We’ll use a simple marker with no fill and a thicker stroke that is coloured to represent the priority level using a filter like:
“priority” ILIKE ‘<PRIORITY>’
Note that we didn’t use a represent_value() function this time because we used a value map widget for this field and the value shown in the widget is the same as the value stored in the data table.
Step 3 - Sync or upload project
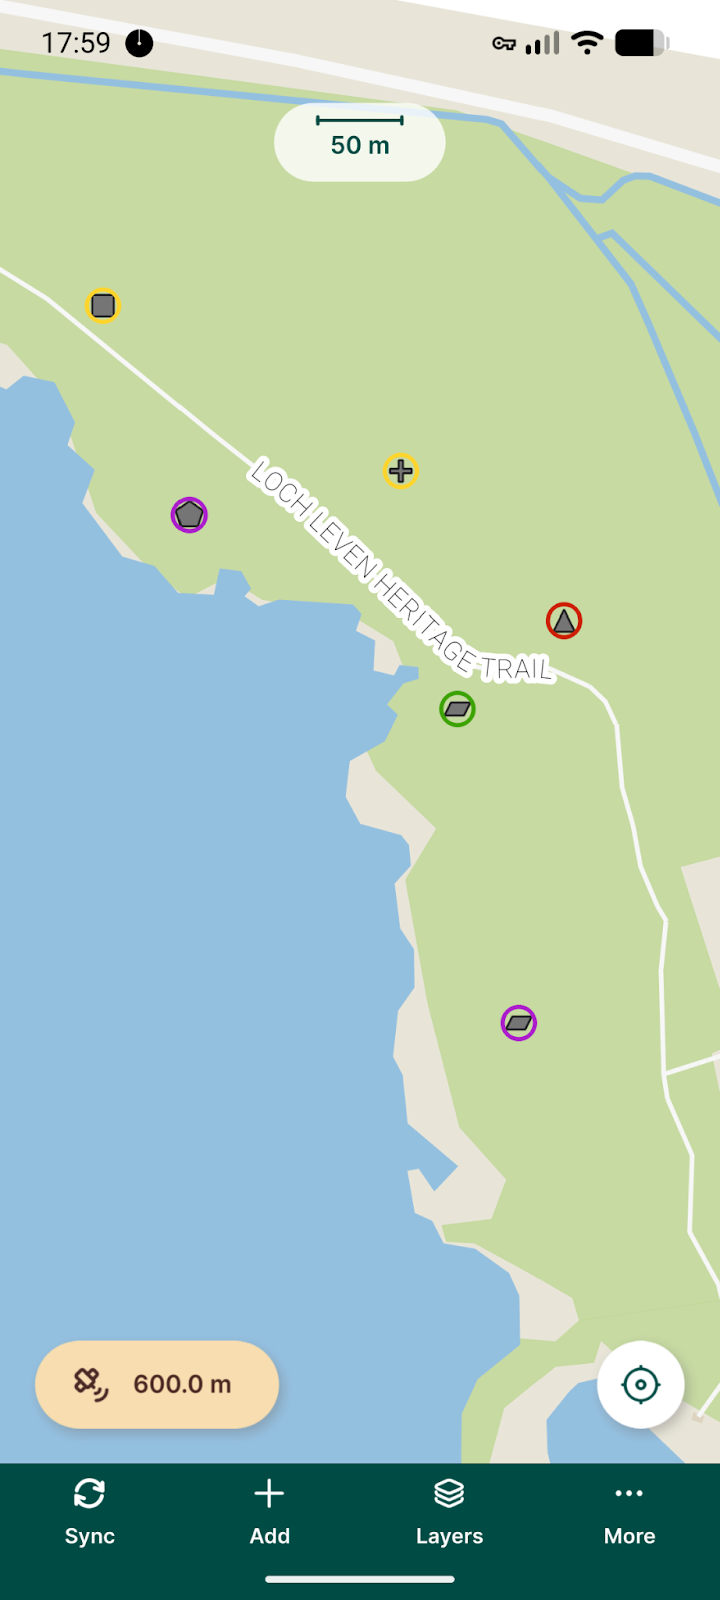
Now that we have our symbology set up, we’re ready to try it out in the field. If your project is already uploaded to Mergin Maps, you just need to synchronise the project. If you haven’t uploaded the project yet, then create a new project using the Mergin Maps Plugin and then download it with the app.
Now when we view the project in the mobile app, we can see the symbology we created in QGIS:
Final tips
This is a basic example of using rule-based symbology to give you an idea of what is possible. There are as many uses for this feature to allow for dynamic symbology in your project. Just be aware that using rule-based symbology can have a negative impact on performance in very large projects. If you notice a drop in performance when you are using this feature, we would recommend trying some of the following steps:
- Limit the visibility of the layer to higher zoom levels so fewer features are loaded on the screen at one time
- Disable any high-resolution imagery or raster background layers
- Consider that both rule-based symbology and virtual layers can use a lot of memory, which is limited on mobile devices, so only use what is most needed for your project
It is possible to use Mergin Maps variables (e.g. user email address) to achieve some interesting results, for example you can hide some features for certain users on the mobile app so they will not be able to view or interact with the features.
We hope you found this tutorial useful. Mergin Maps lets you bring many of the powerful tools available in QGIS to your mobile device. If you’d like to learn more about how you can use Mergin Maps for your field survey, check out our documentation.