Creating a Project in QGIS
In earlier tutorials you created a new survey project from within Mergin Maps mobile app. That was a very fast (albeit limited) way of creating a Mergin Maps project. In QGIS, it is possible to create more complex projects and make the field survey more effective.
In this tutorial you will create a new project for surveying trees and hedges using QGIS.
Before we start
Please ensure you have already:
Create a minimal project
Open QGIS
Locate the Mergin Maps QGIS plugin toolbar in the upper navigation panel in QGIS. Click on the Create Mergin Maps Project button

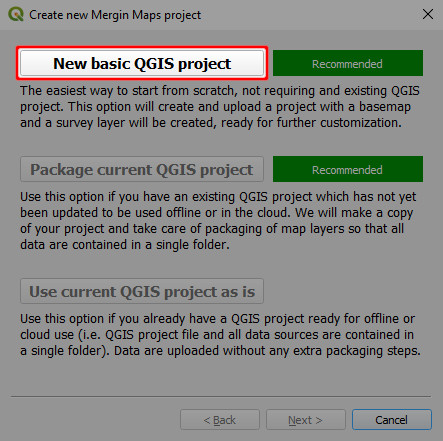
Choose the first option: New basic QGIS project
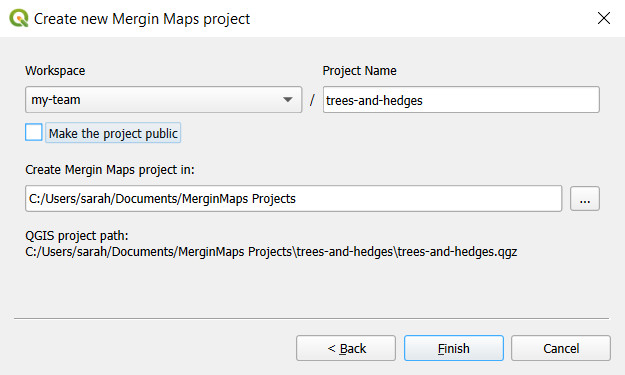
When creating a Mergin Maps project, we need to set:
- a workspace (here:
sarah). If you have multiple workspaces available, choose the one you want to use. - Project Name
- The folder where the project should be created. Here, we use
Documents\MerginMaps Projects
Press Finish to create the project.
- a workspace (here:
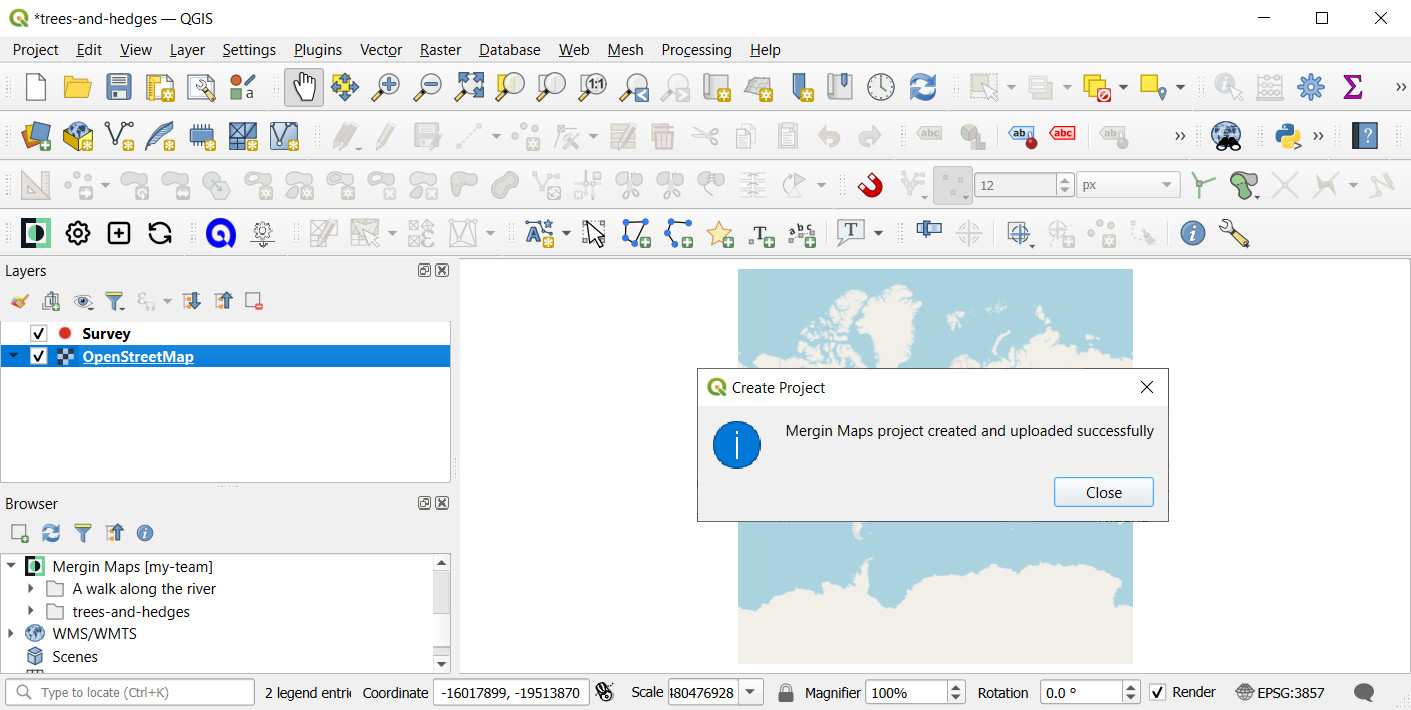
Your new project should now be created and uploaded to Mergin Maps cloud.
Close the dialog window to continue working with this project in QGIS.
Add layers
You may have noticed that the project we have just created with Mergin Maps QGIS plugin is very similar to the project created in Mergin Maps mobile app in the previous tutorial. This basic project contains a single point layer called Survey and OpenStreetMap as a background map.
TIP
Various background maps can be used in Mergin Maps mobile app, if they are supported by QGIS. You can learn how to add offline and online background maps here.
We will now add two more survey layers - a point layer for surveying trees and a line layer for hedges.
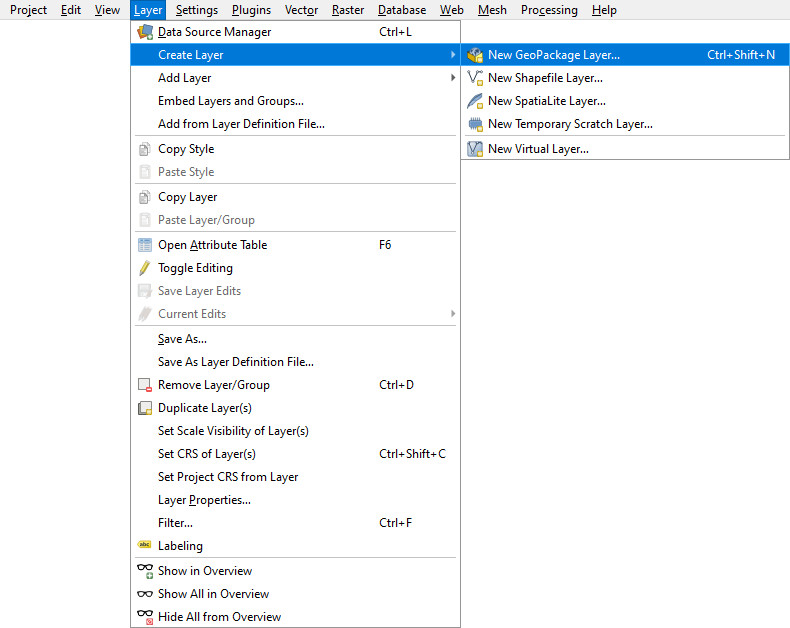
Select Layer > Create Layer > New GeoPackage Layer...
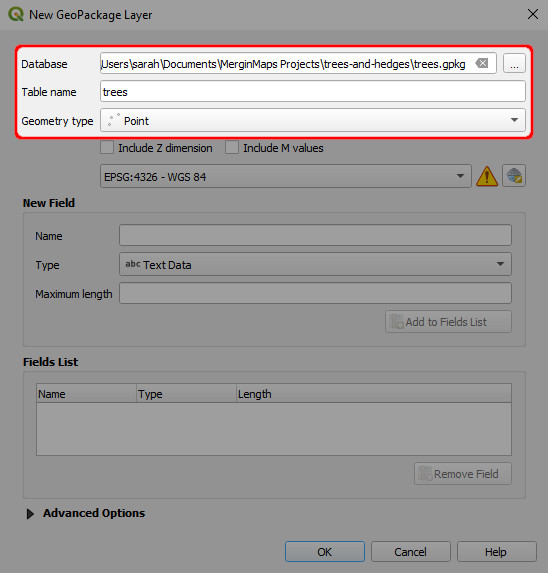
Now we will create the
treeslayer:- Database: navigate to the project's folder and save the GeoPackage as
trees.gpkgHere:Documents\MerginMaps Projects\trees-and-hedges\trees.gpkg - Table name will be set as
treesby default - Geometry type: Point
- Database: navigate to the project's folder and save the GeoPackage as
Add a New Field called
datewith the data type Date
Add two more new fields called
speciesandconditionswith the data type Text Data.In the Fields List, you can see the overview of added attributes and their respective data types. It should look like this:

Click OK. A new layer called
treeshas now been added to the Layers panel.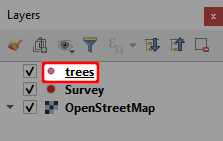
Repeat steps 1 to 5 above to add another new layer called
hedgeswith these details:- Database:
Documents\Mergin Projects\trees-and-hedges\hedges.gpkg - Geometry type: LineString
- Fields:
both_sides_surveyed, data type Booleannum_access_gates, data type Whole Number (integer)photo, data type Text Data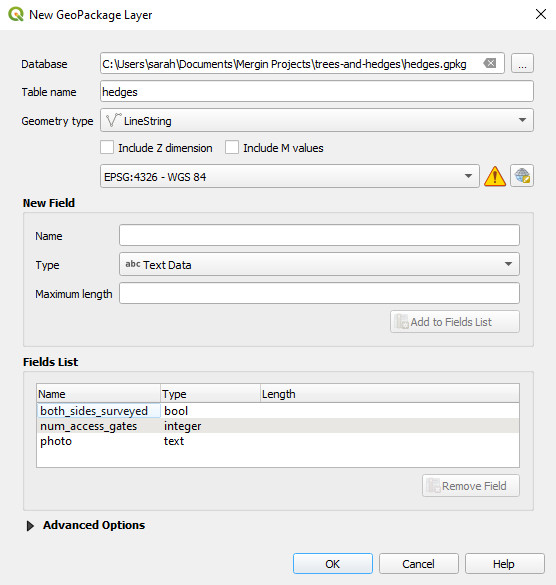
- Database:
Once you are finished, there should be two new layers on the Layers panel: trees and hedges. 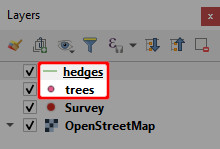
Configure attributes forms
Before we try out this new project in Mergin Maps mobile app we will make a couple of small changes to the layers' form settings. The forms define how users interact with feature attributes in the field.
To illustrate how the form setup can affect the field survey, notice on the example below how the tree species, Black alder, has been accidentally mistyped during the field survey. This can be avoided by setting up a drop-down list (right image). Attributes can also be aliased (renamed) for easier reading.
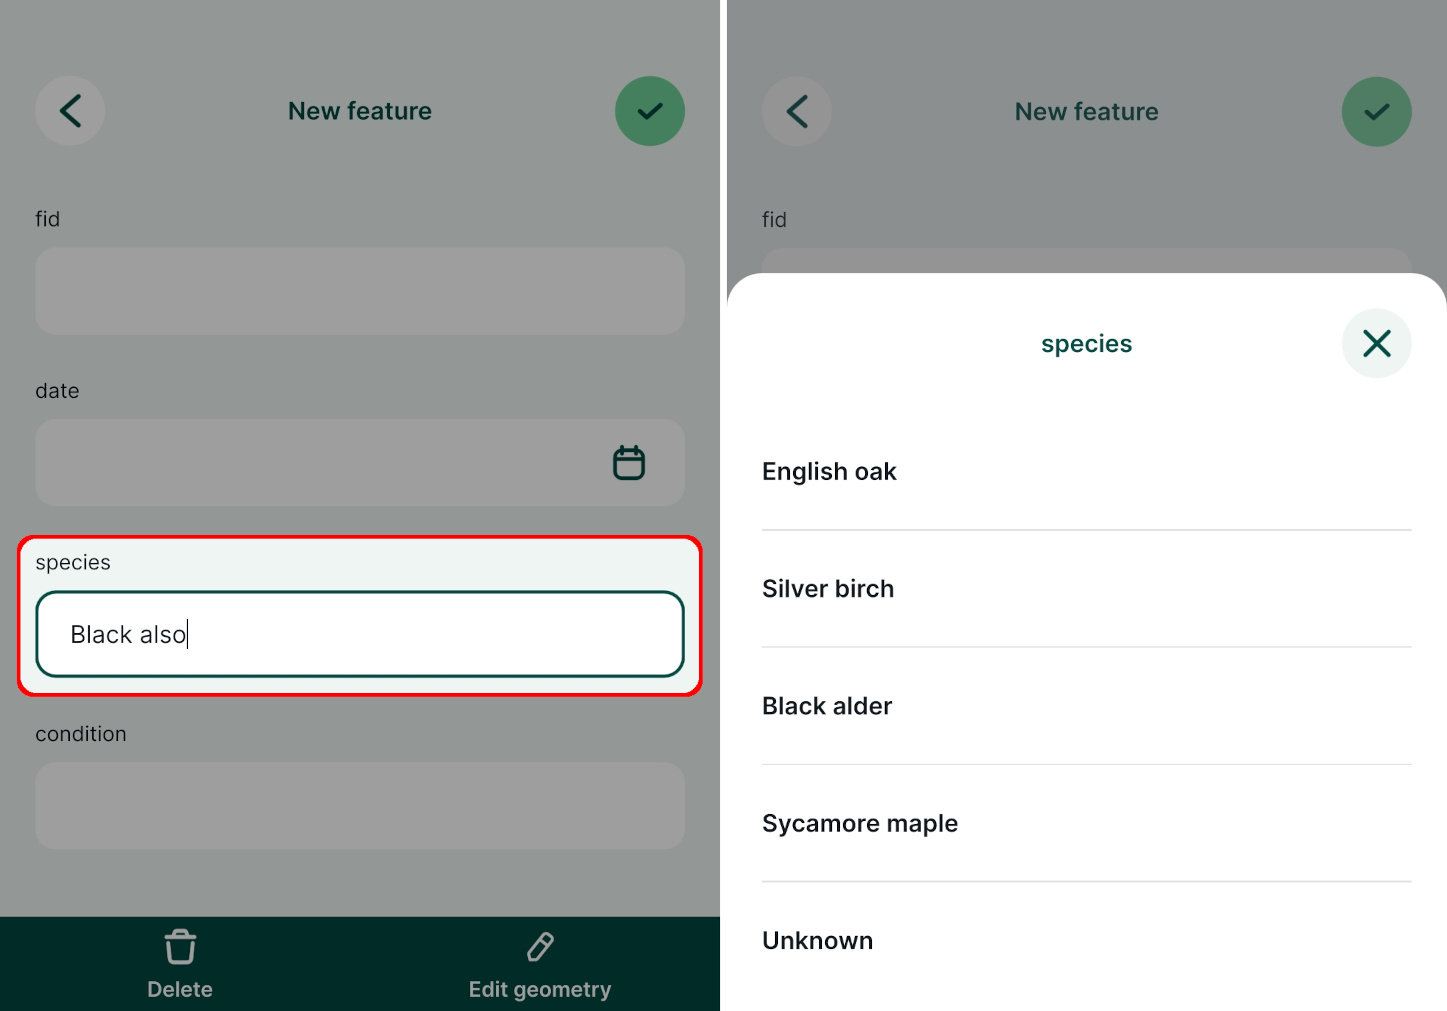
Now we will set up the drop-down list for the trees layer:
Double-click the
treeslayer in the Layers panel to open the Layer properties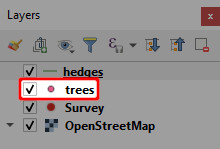
Select Attributes Form on the left and click on the
speciesattribute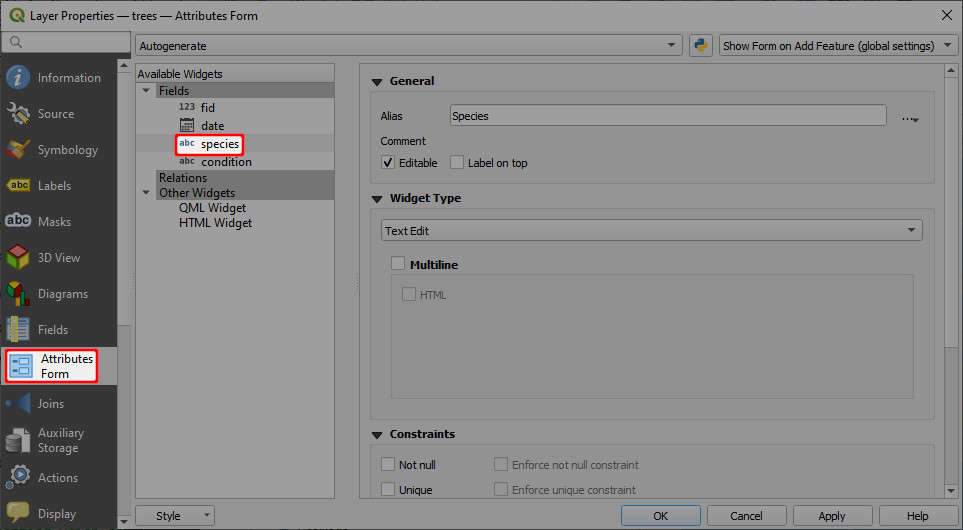
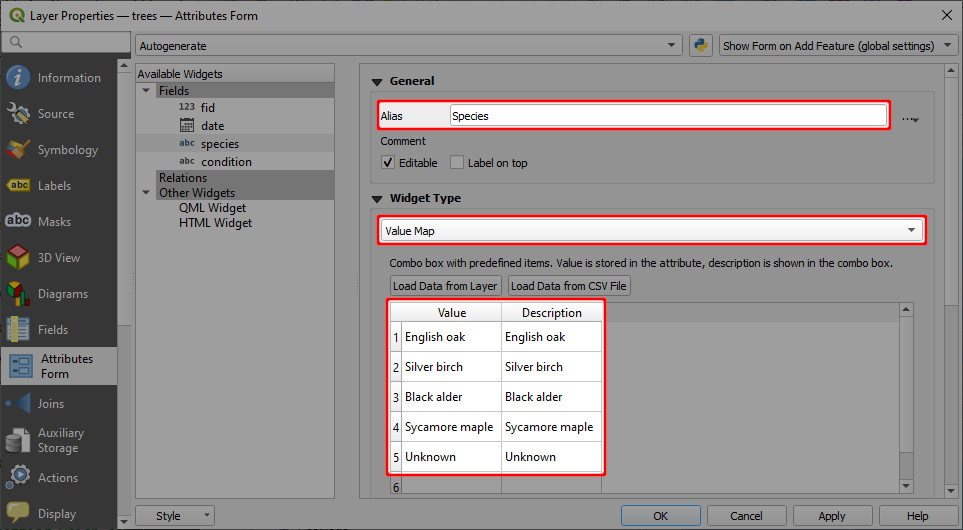
Make the following changes to the
speciesattribute:- Enter the Alias that defines how the attribute's name is displayed in the form.
- Change the Widget Type to Value Map
- Enter Values and Descriptions similar to these (both are set the same in this example):
TIP
Value is how the data will be stored in the underlying dataset and Description is how it will be displayed in the form to the user.
Click on the
fidattribute. Uncheck Editable option so that it can not be edited during the survey.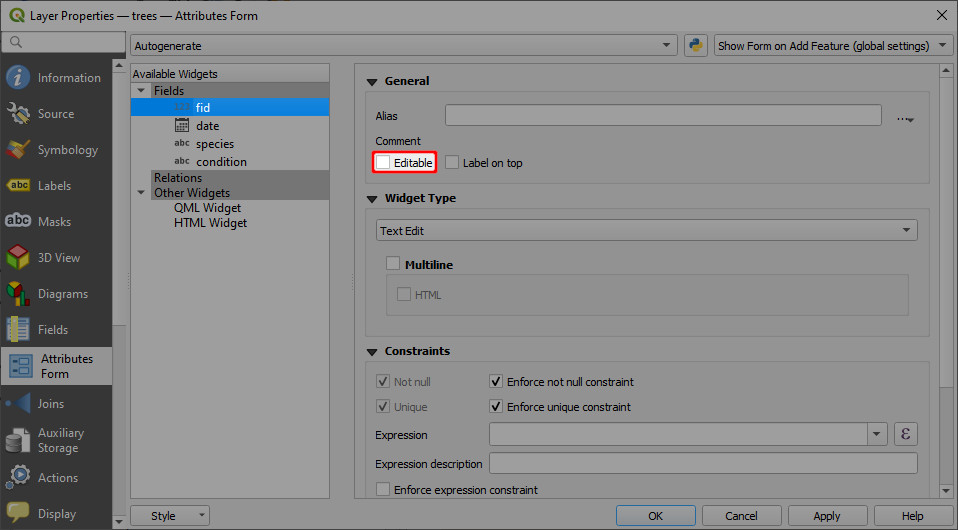
TIP
fidis a special attribute used to identify features. We recommend not allowing users to edit this attribute.The setup of the
treeslayer is complete. Click OK to close the Layer Properties window.
Configuring photo attribute
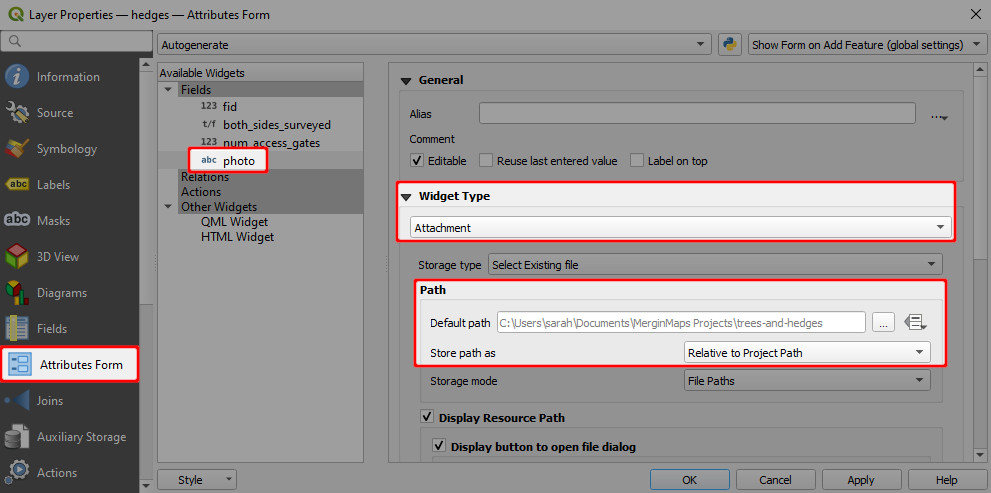
The hedges layer has an attribute called photo. The attribute itself is stored as Text Data and we will use it to attach photos to surveyed features. To achieve this, we need to configure the photo attribute's Widget Type as Attachment.
Double-click the
hedgeslayer to open the Layer propertiesSelect Attributes Form on the left and click on the
photoattributeSet the form for the
photoattribute as follows:- Widget Type to Attachment
- Path defines where the photos will be stored. Set Store path as Relative to Project Path:
fidshould not be editable. Click on thefidattribute and uncheck the Editable option.Click OK to close the Layer properties.
TIP
There is much more that can be done with the Attributes Form in QGIS when preparing a Mergin Maps project! You can learn more about forms in Setting Up Form Widgets, Advanced Form Configuration or other pages in the Configure Survey Layer part of this documentation.
Saving changes to Mergin Maps
In the next tutorial we will see how this project looks on Mergin Maps mobile app. We'll now make some last changes, save them and sync the project back to the Mergin Maps cloud.
Right click on the layer called
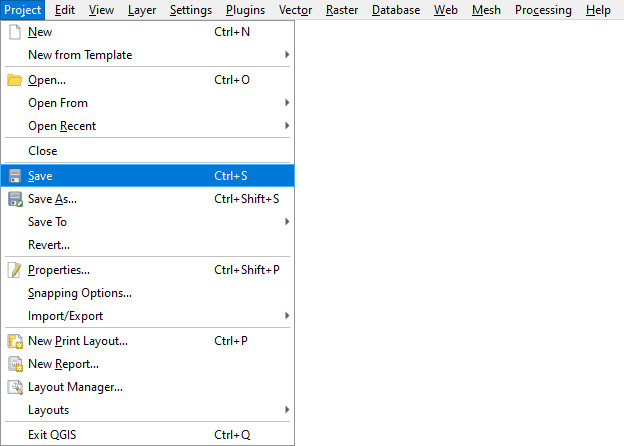
Surveyand find the Rename Layer option. Rename the layer toSurvey notes(the nameSurveyis too general in this context).Save the QGIS project
Use the Synchronise Mergin Maps Project button in the Mergin Maps QGIS plugin toolbar (it is located in the upper navigation panel)

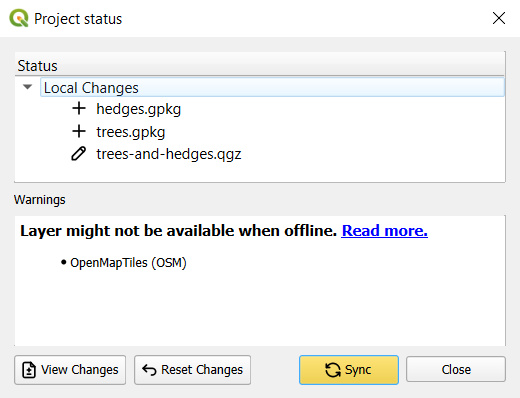
The Project status window will open. It contains the overview of local changes that were made since the last synchronisation: two layers were added to the project (
hedges.gpkgandtrees.gpkg) and some changes were made in the QGIS project file (trees-and-hedges.qgz).Click Sync to synchronise the project
In a few moments your changes are safely stored in the Mergin Maps cloud 
Synchronising changes between users and devices is a core principle of Mergin Maps. When you sync a project, changes that have been made by other users and devices since you last synced are fetched and any changes you've made are pushed.
Changes are merged safely and easily from different users, even when they edit the same feature. Mergin Maps tracks project version history so you can download a previous version of a project if you need to.
Public project available
The project created in this tutorial documentation/t3-trees-and-hedges is public. If needed, you can download it and compare it with your results.