Background Maps
When surveying in the field, it is essential to have appropriate background maps. There are several sources of background maps you can use in your QGIS project. Here, we will cover two types of background maps for online and offline use in Mergin Maps mobile app: raster and vector tiles.
Online maps need internet connection to be displayed during the field survey and can use up a lot of mobile data, especially if you are using online raster maps.
WARNING
Keep in mind that background maps services and data sources come with their own terms of use.
Although we show how to add online and offline background maps to your projects, it is your responsibility to comply with any terms and condition of the services of your choice.
Raster tiles
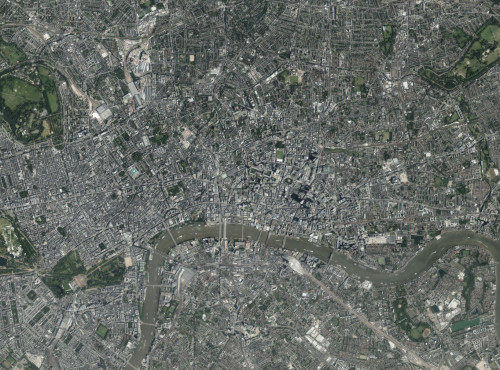
Raster tiles are ideal for aerial imagery or terrain visualisations. They can be large in size and can appear pixelated when zoomed in.
Online services
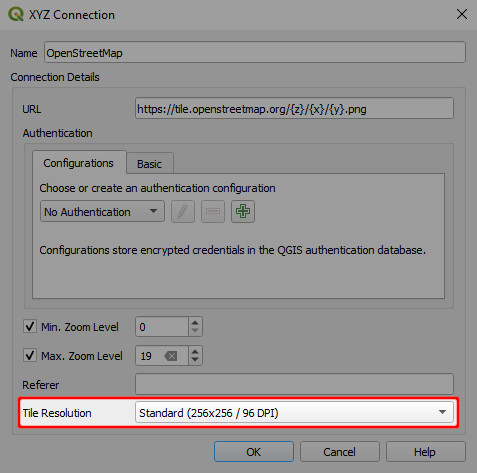
QGIS comes by default with the OpenStreetMap online services for XYZ tiles. When adding a cartographic basemap, ensure you set the tile size correctly, so that the texts and labels are readable on mobile devices with high resolution display.
WARNING
Online raster maps can use up a lot of mobile data during the field survey.
You can also add other sources of XYZ tiles to your QGIS.
To add Bing aerial imagery to your QGIS project:
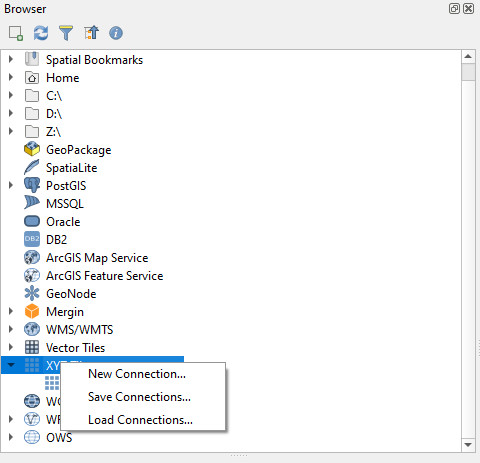
In QGIS, navigate to the XYZ Tiles in the Browser panel
Right-click on XYZ Tiles and select New Connection
Set the parameters of the XYZ connection:
- Name: Bing aerial imagery
- URL:
http://ecn.t3.tiles.virtualearth.net/tiles/a{q}.jpeg?g=1Press OK.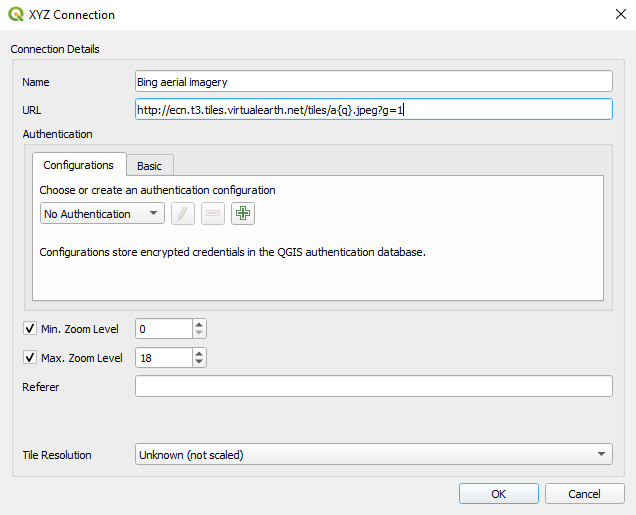
Now, the XYZ Tiles in the Browser panel should contain the Bing aerial imagery. Double click on it to add it to your project and zoom to your area of interest. 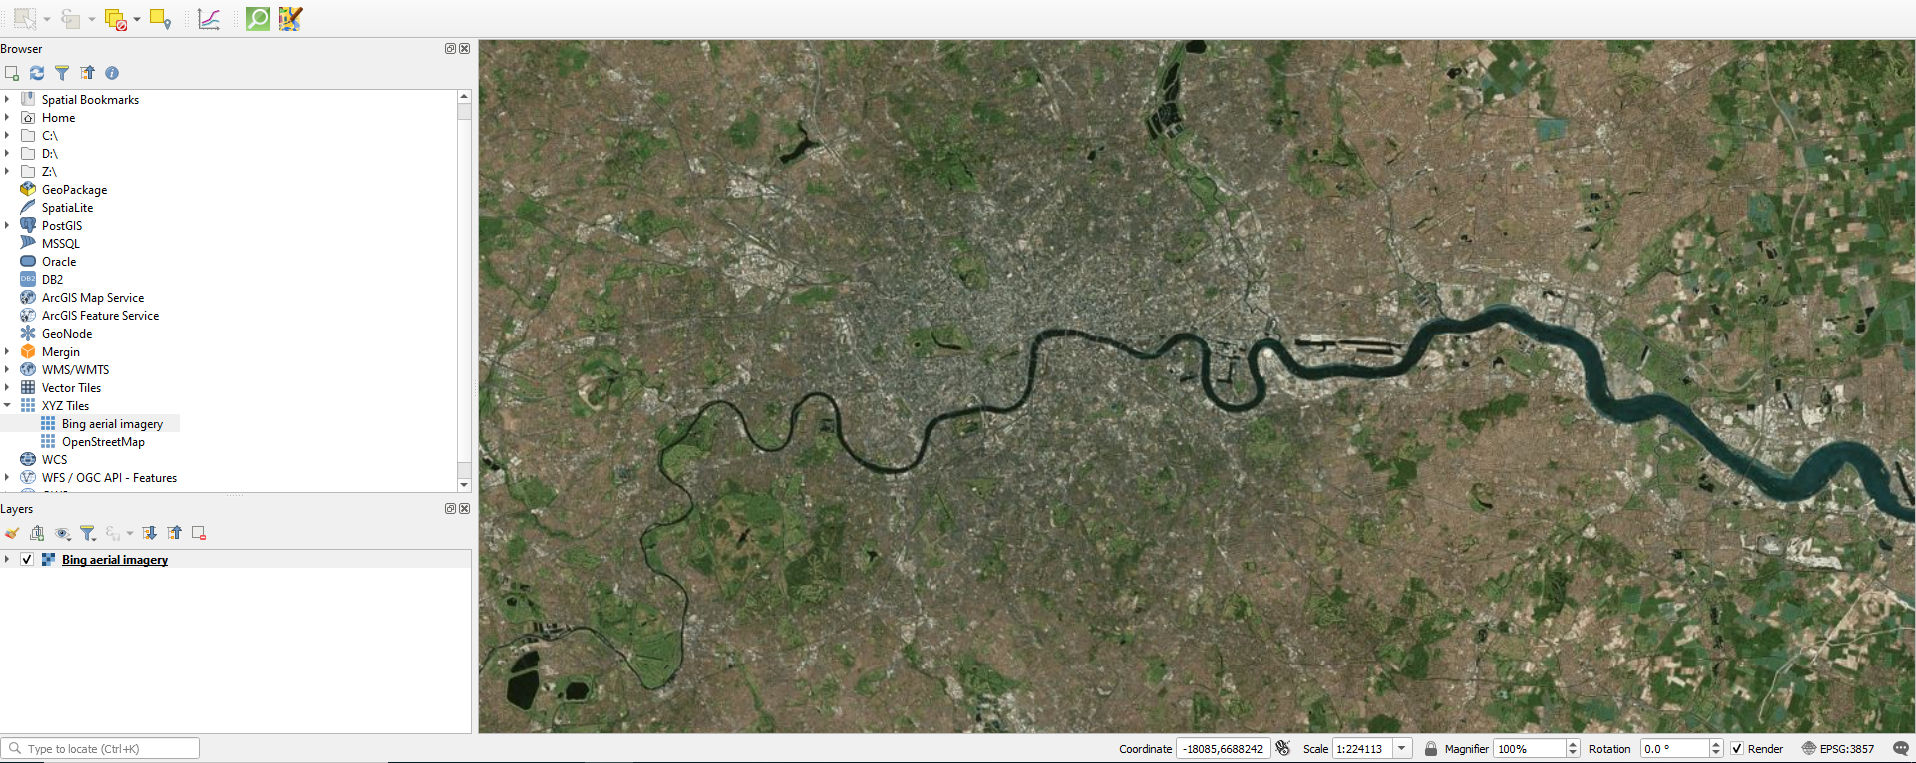
TIP
When using XYZ tiles that contain labels, ensure to set the tile resolution to Standard in the connection settings. This will ensure the fonts are readable on the high resolution screens (the majority of the recent smartphones comes with high DPI screens).
Generating XYZ/MBTiles raster tiles for offline use
QGIS also offers a processing algorithm to generate raster tiles for offline use.
Make sure that you:
- added the Bing aerial imagery to the QGIS project
- zoomed to your area of interest
To generate an offline copy of the aerial imagery from your map view extent:
In QGIS, select Processing > Toolbox from the main menu. The Processing panel will appear on the right side of QGIS window.
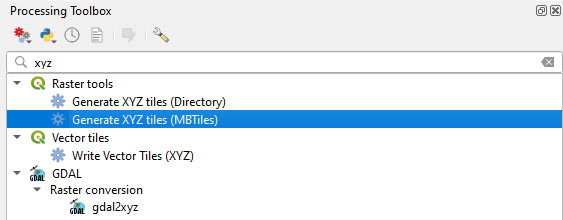
In the search section on the top of the Processing panel, type xyz to display relevant tools.
In Raster tools, double-click on Generate XYZ tiles (MBTiles)
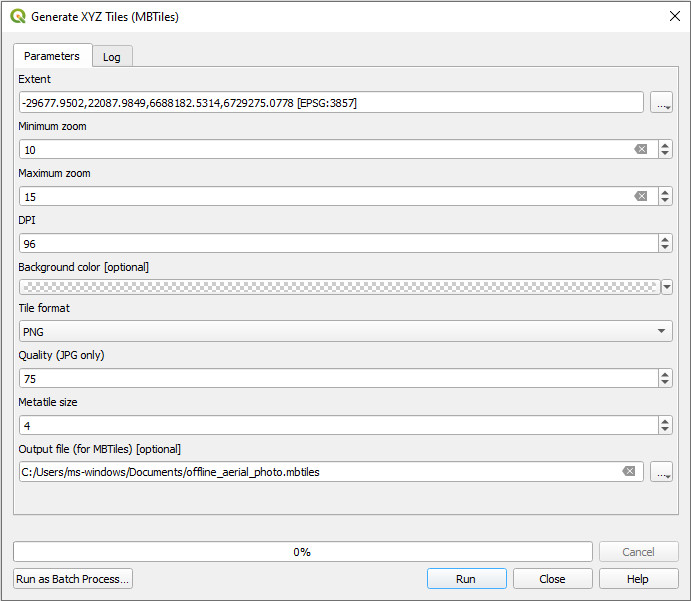
Set the parameters of Generate XYZ tiles (MBTiles) tool:
- Extent: click on the right-side drop-down menu and select Use Map Canvas Extent
- Minimum zoom: 10
- Maximum zoom: 15
- Output file (for MBTiles): click on the right side drop-down menu and select Save to file. Browse to the folder where you want to save the MBTiles and name the file. Here:
offline_aerial_photo.mbtiles - Click Run
WARNING
Depending on the size of your study area and the zoom level, the output file can be very large. See how to work with large files in Mergin Maps mobile app.
Vector tiles
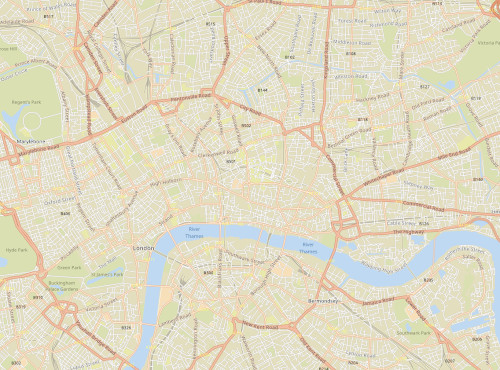
Vector tiles are a better alternative for cartographic maps as background data. They are smaller in size, have flexible styling and your maps will not be pixelated even when zoomed in.
There are several online services you can use in your projects, some of them are mentioned below.
Online services
Let's see how we can add ESRI Basemap vector tile (QGIS 3.16+):
- In QGIS, navigate to the Vector Tiles in the Browser panel
- Right-click on Vector Tiles and select New Generic Connection
- Set the parameters of the Vector Tiles connection:
- Name: ESRI Basemap
- URL:
https://basemaps.arcgis.com/v1/arcgis/rest/services/World_Basemap/VectorTileServer/tile/{z}/{y}/{x}.pbf - Min. Zoom Level: 0
- Max. Zoom Level: 14
- Style URL:
https://basemaps.arcgis.com/b2/arcgis/rest/services/World_Basemap/VectorTileServer/resources/styles/root.jsonPress OK.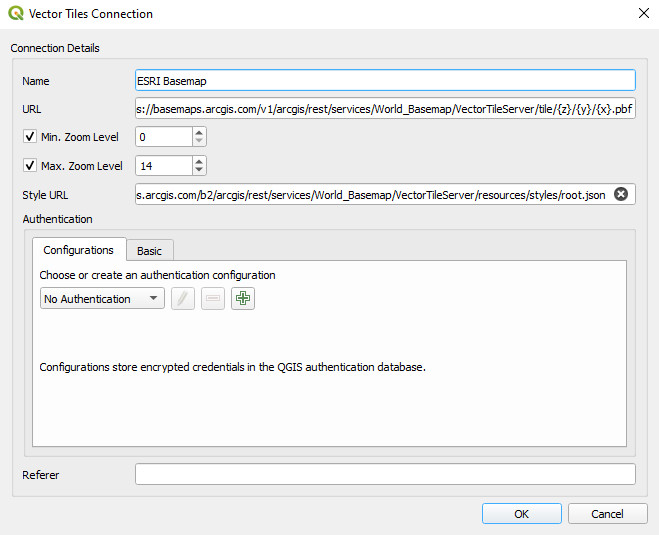
Another source of online vector tiles are Qwant maps. Use following
- Name: Qwant map
- URL:
https://www.qwant.com/maps/tiles/ozbasemap/{z}/{x}/{y}.pbf - Min. Zoom Level: 0
- Max. Zoom Level: 14
- Style URL:
https://raw.githubusercontent.com/QwantResearch/qwant-basic-gl-style/master/style.json
Mergin Maps vector tile service
When creating a new Mergin Maps project from scratch, the default background map uses Mergin Maps vector tile service.
It can be also added to existing Mergin Maps projects by using following parameters to set the Vector Tiles connection:
- Name: OpenMapTiles (OSM)
- URL:
https://tiles.merginmaps.com/data/default/{z}/{x}/{y}.pbf - Min. Zoom Level: 0
- Max. Zoom Level: 14
- Style URL:
https://tiles.merginmaps.com/styles/default.json
This service can be used by Mergin Maps users only .
Using the service is conditioned by the attribution: © OpenMapTiles © OpenStreetMap contributors
Generating vector tiles for offline use
Since QGIS 3.32, the easy-to-use Download vector tiles algorithm is present in the Processing toolbox in QGIS. With Mergin Maps QGIS plugin, it can be used also in older QGIS version (3.16+) and is readily available from the Layers panel.
There are also other ways how to get offline vector tiles, such as using OpenMapTiles and Docker:
Generate vector tiles using OpenMapTiles and Docker (Advanced)
In the example below, we walk through steps to generate a vector tile using OpenMapTiles for Limpopo.
Note that instructions below require familiarity with the terminal. In addition, your operating system should support docker.
- Clone the OpenMapTiles repository:
git clone git@github.com:openmaptiles/openmaptiles.git - Download osm.pbf file for the country or region where your area falls in from here.
- Search for your area of interest and find the OSM relation ID (from here using method described here or alternatively download it from this git repository if available).
- Clip the osm.pbf downloaded in step 2 using the poly downloaded in step 3:
osmconvert south-africa.osm.pbf -B=limpopo.poly --complete-ways --complete-multipolygons -o=my.osm.pbf - Place my.osm.pbf under openmaptiles/data/
- Run
./quickstart.sh myfrom openmaptiles/ folder (where you cloned your repository): this will generate the tiles with the default settings (i.e. low zoom level of max=7) - Edit openmaptiles/data/my.dc-config.yml and change the Max_Zoom to 14
- Re-run
./quickstart.sh my - The above process should produce an MBTiles for your clipped OSM file
- You can load the file and style it using one of the OpenMapTiles styles
Downloading vector tiles using Mergin Maps QGIS Plugin
Since QGIS plugin 2023.4Vector tiles for offline use can be downloaded easily using Mergin Maps QGIS plugin.
Open your Mergin Maps project in QGIS.
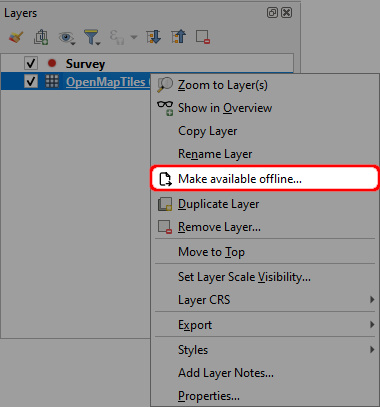
In the Layers panel, right-click on the vector tile layer and choose the Make available offline... option
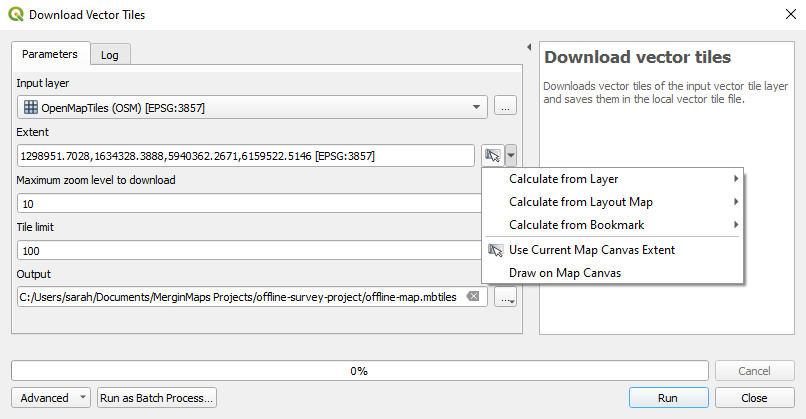
Download Vector Tiles dialog opens. Set the parameters as needed:
- Extent should be defined by your area of interest. You may calculate it from your survey layer, use the current map canvas extent (after zooming in), or other options that are provided.
- Maximum zoom level to download defines the detail that will be visible on the offline map. For more information about zoom levels, see, for instance OpenStreetMap wiki.
- Tile limit is the maximum number of tiles that you want to download.
- Output will be saved as a MBTiles file. Click on the right side drop-down menu, select Save to file, browse to the folder where you want to save the MBTiles and name the file.
MBTiles can be stored in your Mergin Maps project folder and synchronised to Mergin Maps along with your project. If you find it impractical to synchronise them or if you want to use the same file in multiple projects, follow the steps on How to work with large files in Mergin Maps mobile app.
Click Run. After the vector tiles are generated and downloaded successfully, the MBTiles file will be added to the Layers panel. You may close the algorithm dialog window.
Save and synchronise the project.
TIP
Before taking your offline tiles to the field, we recommend checking in Mergin Maps mobile app that they have sufficient extent and zoom level.
How to work with very large files (Android)
Android onlyRaster and vector tiles generated for offline use can be relatively large files, especially when using high resolution data or a large area of interest. It may be impractical to synchronise these large files through Mergin Maps or to have duplicate copies if they are used in multiple projects.
TIP
If you do not need to use your background maps offline, consider creating a WMS or WMTS server for online use.
QGIS uses relative paths to load the data. If your Mergin Maps project refers to files located in another folder, this project can be loaded just fine on another computer or in Mergin Maps mobile app - if the folder with the files can be found in its expected location.
On your computer, create a folder that will contain the large datasets (here:
_rasters). It should be located in the same directory as your Mergin Maps projects.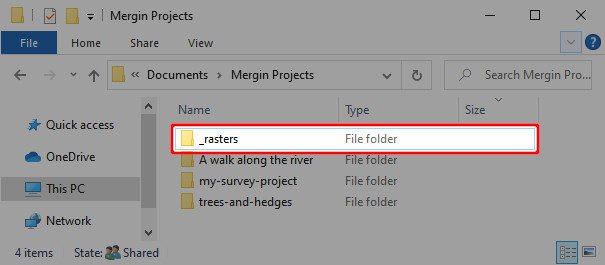
Open your Mergin Maps project in QGIS. Load the files from the
_rastersfolder to the project. Save and sync.Connect your mobile device to the computer and copy the
_rastersfolder to the app's project folderInternal storage/Android/data/uk.co.lutraconsulting/files/projects.See Manual data transfer (Android) for detailed steps.
Use the project in Mergin Maps mobile app as usual.
TIP
Files from the folder can be loaded into multiple Mergin Maps projects.
WARNING
Files located in the another folder are not synchronised. This saves your storage on Mergin Maps cloud. However, if you want to update or modify these files, you have to connect the mobile device to your computer and do it manually.