# Attributes Form Layout
Collecting and editing data in the field can be more efficient with forms that are easy to navigate. QGIS offers a lot of options for improving the layout of your forms, such as using groups and tabs to keep related fields together, displaying or hiding a group of fields based on conditional visibility, or displaying tips and instructions in the forms.
# QGIS Drag and Drop Designer
By default, the form is automatically generated and contains all the fields in the layer. However, you might want to change the order of the fields. Also, there may be some fields that do not need to be displayed during the survey, such as fields with default values that are calculated from the geometry.
QGIS Drag and Drop designer is an easy tool for defining the form layouts:
Open your Mergin Maps project in QGIS
Right-click on a layer and select Properties
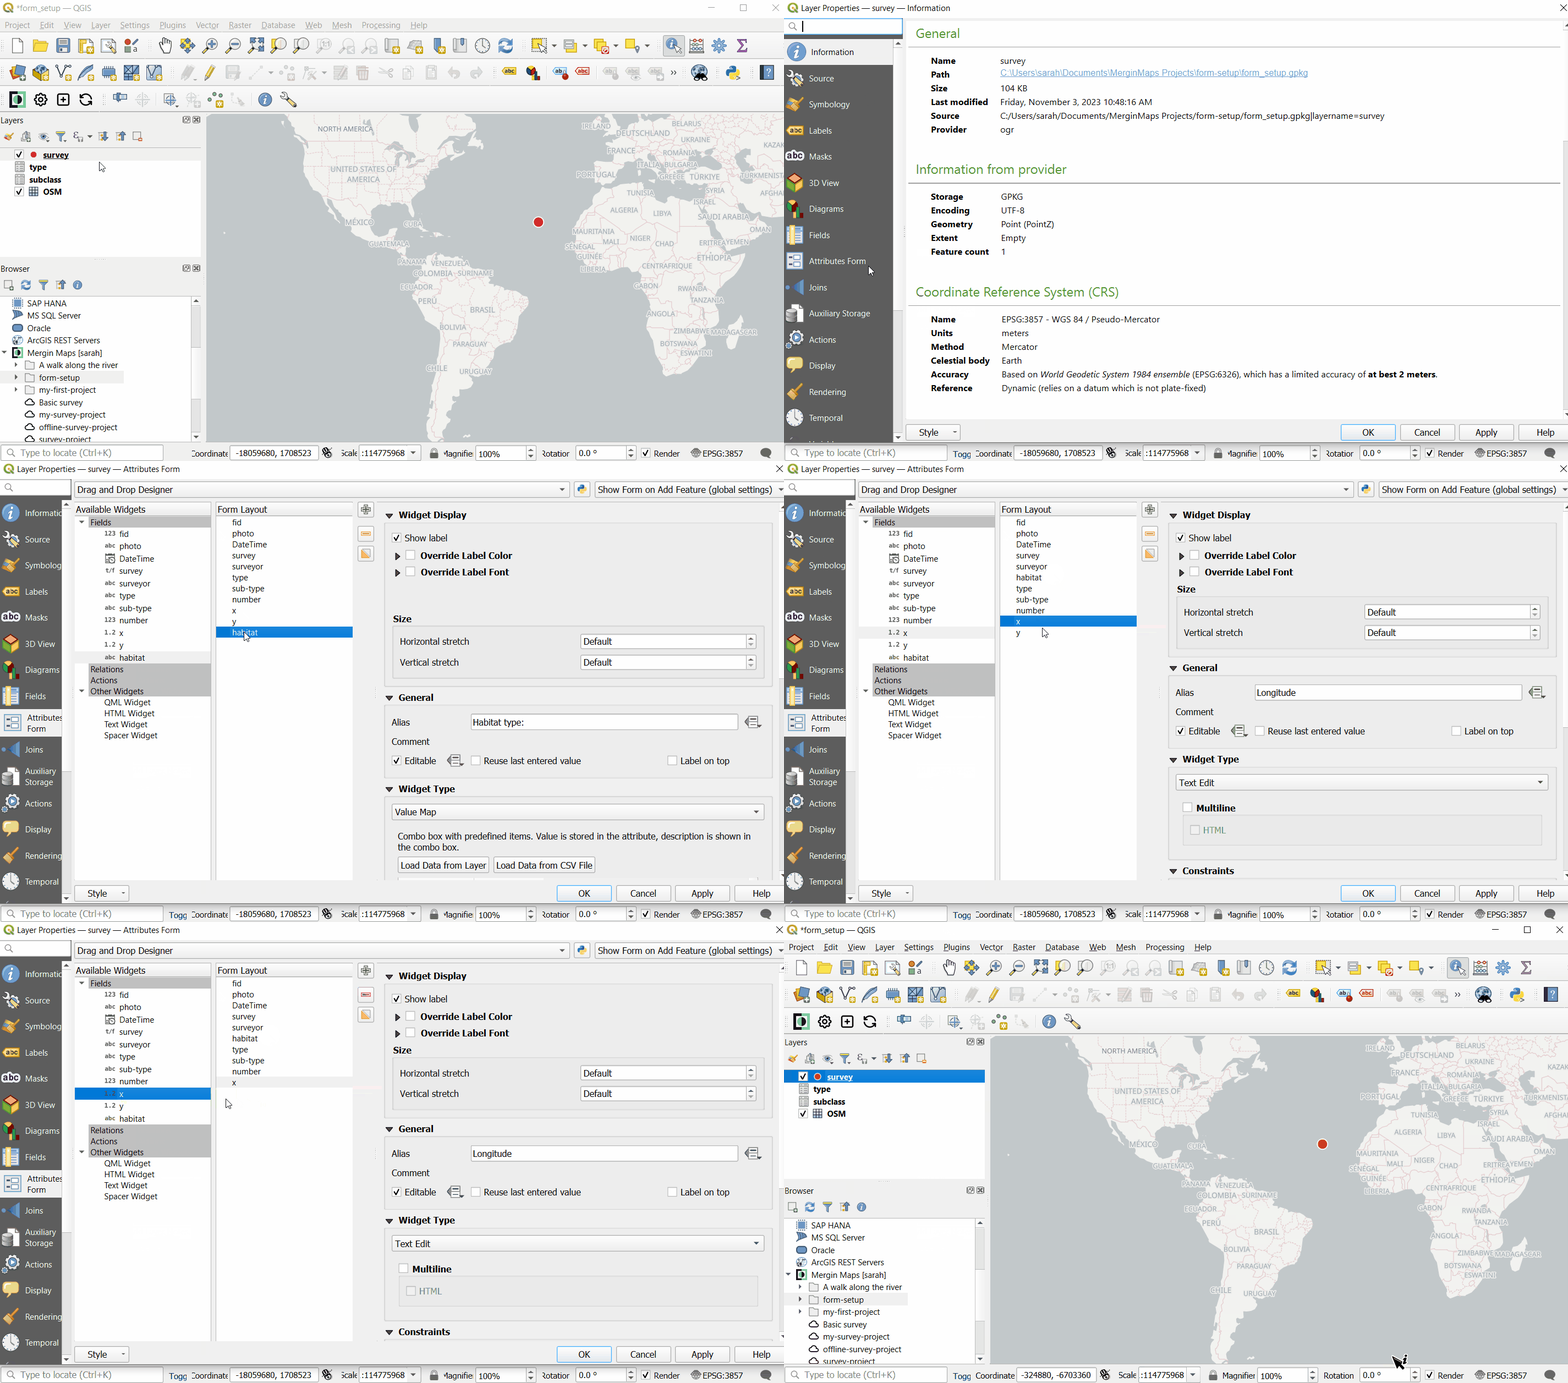
Navigate to the Attributes form tab. Here, switch to Drag and Drop Designer
Fields can be added and removed from the Form Layout. The order of the fields can be changed by simply dragging them higher or lower in the list.
Only fields that are in the Form layout will appear in the form.
Click OK to confirm your changes.
# Tabs and groups
Using QGIS Drag and Drop designer, fields can be arranged into groups and tabs.
Example project available
To see an example of tabs and groups, you can clone documentation/form_setup (opens new window).
Click on the + button to add new group or a tab to the form layout
Choose the container type, add a label, and if needed, the number of columns.
A group can be placed within a tab or another group.
Drag and drop fields to tabs or groups as needed.
Here we have two tabs, Data and Changelog. The Data tab contains two groups: roads and paths.
The form with tabs and groups will appear in QGIS like this:
And this is how the same form looks like in the mobile app:
# Show and hide fields depending on a field value (conditional visibility)
Conditional visibility can be applied to groups and tabs, meaning they will be displayed or hidden depending on the value of a field.
Example project available
You can explore this functionality in documentation/form_setup (opens new window).
Here we will use a line layer named roads and paths
. It is designed for surveying both roads and paths and most of the fields are relevant for every type of feature in this layer. However, there are some attributes that are specific for roads (e.g. the number of lanes) or for paths (e.g. the visibility of the path).
The form uses the value of the type
field to display the relevant set of attributes. The type
field is set up as value map with defined values road
and path
.
To set the visibility of groups in the attributes form:
- Click on the roads group in the Form Layout
- Check the Control Visibility by Expression option ✔️
- Define the expression. Here we use:
"type" = "road"
- Same steps are used for the path group using the expression
"type" = "path"
In the mobile app, the form displays these groups only when the condition is met. So, there are different sets of attributes depending on the value that is entered in the type
field.
# Display instructions in the form using Text and HTML widget
Sometimes, you may want to include instructions or tips for surveyors in your forms. QGIS (opens new window) offers Text and HTML widgets that can be used for this purpose. Your text instructions can include expressions and field values as well. The HTML widget supports various HTML tags (opens new window), so it can be also used, for instance, to display online images.
These widgets can be found in Available Widgets in the Other Widgets section when using the Drag and Drop Designer.
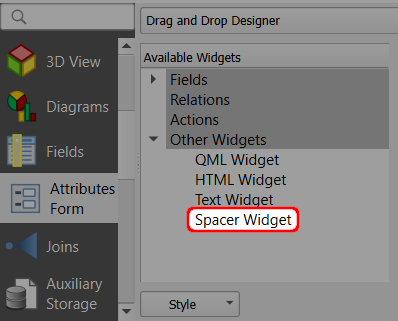
To configure the Text widget, enter the text you want to display in the form. On the right, you will see the preview.
If you prefer your text to be formatted, you may do so in the HTML widget. HTML widget supports these HTML tags (opens new window).
...and this is how the Text and HTML widgets look like in the form in QGIS (left) and in the mobile app (right).
# Using expressions in Text and HTML widgets
Expressions and variables can be used both in the Text and the HTML widget.
TIP
Clone documentation/form_cascade (opens new window) to follow this example.
When configuring the Text or HTML widget, click on the Expression Builder button
Enter the expression that will be used in your text and click OK.
Field values can be selected from the Fields and Values list. There are other variables and expressions that can be used.
Click on the + button to add the expression to the text.
Here, we configured the widget with this text:
Make sure the number plate [% "VRP" %] is visible in the photo.
In this case,
VRP
is the name of a field aliased asVehicle Registration Plate
in the form.Save and synchronise your project.
... and this is how it works during the field survey. [% "VRP" %]
expression displays the current value of the Vehicle Registration Plate
field.
# Using HTML widget to display online images and other online resources
The HTML widget can be also used to display online images in the mobile app or open online resources, such as PDF files, videos or websites, in the browser of your device.
TIP
Clone documentation/forms-display-images-and-files (opens new window) to how this works.
Here are HTML samples you can use to configure the HTML widget. Your form should contain a text field for storing the full URL link (here: link
).
To use these samples, replace link
by the name of the appropriate field in your layer.
- show image in the form
<script>document.write(expression.evaluate("'<a href=\"'||attribute( @feature, 'link' )||'\"><img src=\"'||attribute( @feature, 'link' )||'\" width=300></a>'"));</script>
- display a text (
here is your link
) with a link that can be opened in a browser
<script>document.write(expression.evaluate("'<a href=\"'||attribute( @feature, 'link' )||'\">here is your link</a>'"));</script>
Make sure that the HTML widget works before taking it to the field by testing it in the mobile app. It should look something like this:
Image preview in QGIS 3.36+
QGIS may not display the preview of the online image if you use QGIS 3.36 or higher. Despite this behaviour, the mobile app displays it correctly. Therefore we recommend trying the setup by opening the form in the mobile app to make sure it works as intended.
# Using HTML widget to open local files
The HTML widget can also be used to open local files: for instance, a locally stored PDF file can be opened from within the form during the survey.
TIP
Clone documentation/forms-display-images-and-files (opens new window) to how this works.
- A PDF file named
my-pdf.pdf
is stored in the main project folder as it needs to be packaged with the project. - The HTML Widget is added to the Attributes Form and configured as follows:
<a href="project://my-pdf.pdf">Open File</a>
In the mobile app, you can tap the Open File link to open the PDF file using the default application of your device.
Open local files using default values
Local files can be displayed in the form also using default values.
In the documentation/forms-display-images-and-files (opens new window) project, you can explore and compare both alternatives.
# Spacer widget
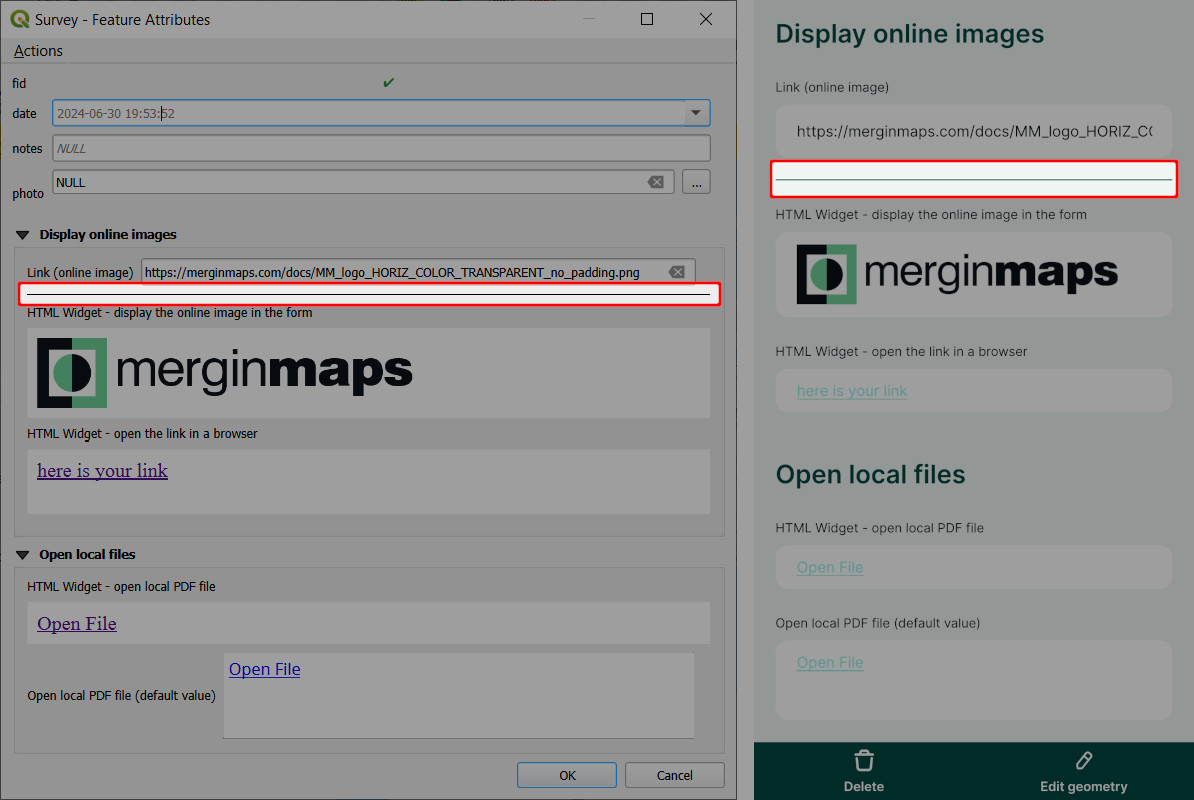
since QGIS 3.30The Spacer widget can be useful if you want to have some space between the fields in your form or add a horizontal line.
It can be found in Available Widgets in the Other Widgets section when using the Drag and Drop Designer.
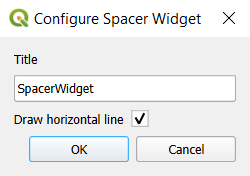
When adding the spacer widget to the form, there is an option to check the Draw horizontal line option. Otherwise, a vertical space will be added to the form.
And this how the spacer widget looks like in the form in QGIS (left) and in the mobile app (right).