Appearance
How to Install Mergin Maps QGIS Plugin
Before the installation of Mergin Maps QGIS plugin, please ensure you have already:
Plugin installation
Open QGIS on your computer
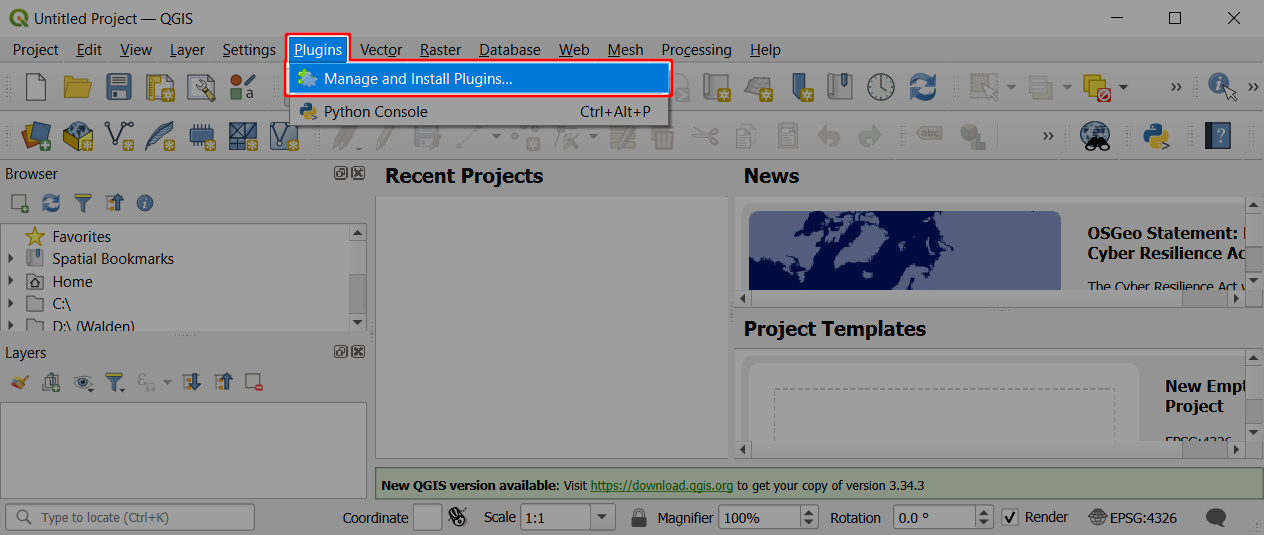
Select Manage and Install Plugins... in the Plugins tab:

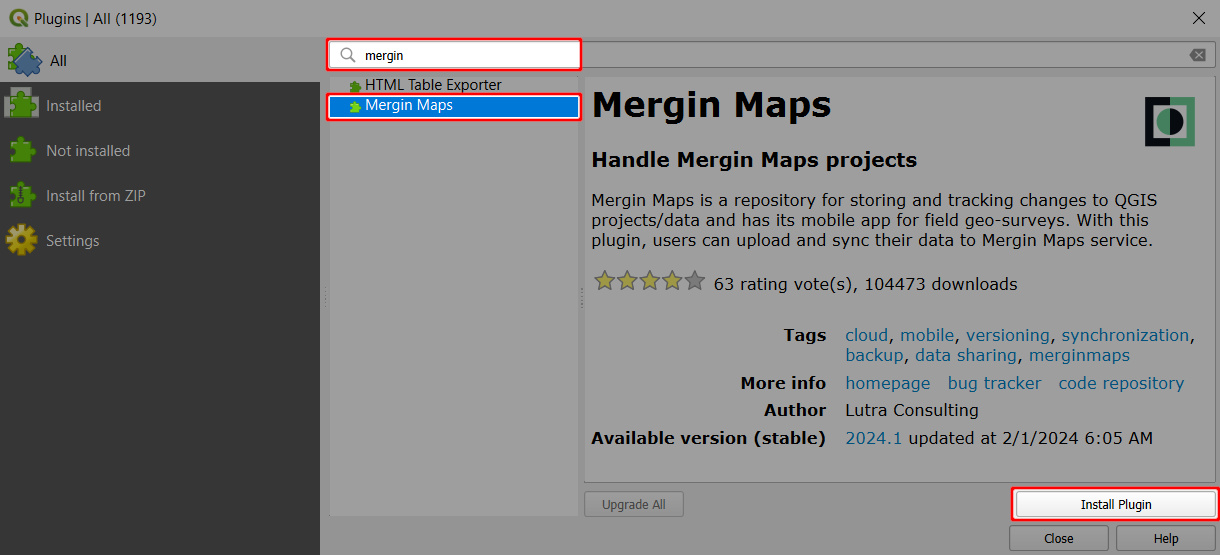
Find the Mergin Maps plugin and click Install Plugin:

Close the Plugins dialog. The Mergin Maps QGIS plugin toolbar should appear in QGIS:

TIP
If you cannot see the toolbar, ensure Mergin Maps Toolbar is checked under View > Toolbars.
Plugin configuration
With the plugin installed, we'll now configure it with your Mergin Maps credentials.
Click the Configure Mergin Maps QGIS plugin icon on the Mergin Maps Toolbar:

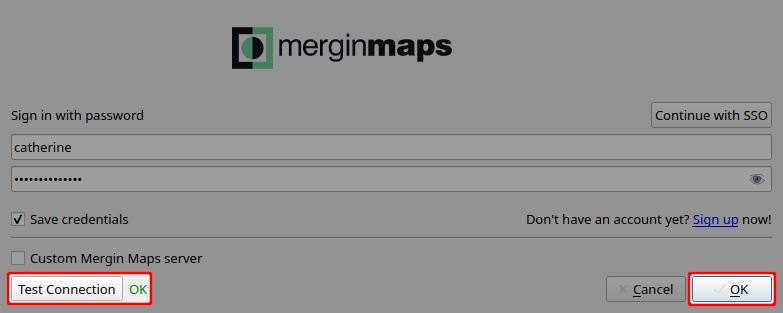
Enter your login credentials if these are blank
Click Test Connection to verify that everything works correctly. If so, click OK.

The plugin has been installed and configured. You can learn more about its functionality in Mergin Maps QGIS plugin Overview.
Plugin upgrade
Upgrade the plugin periodically to ensure you can use the latest improvements.
In QGIS, navigate to Manage and Install Plugins... in the Plugins tab

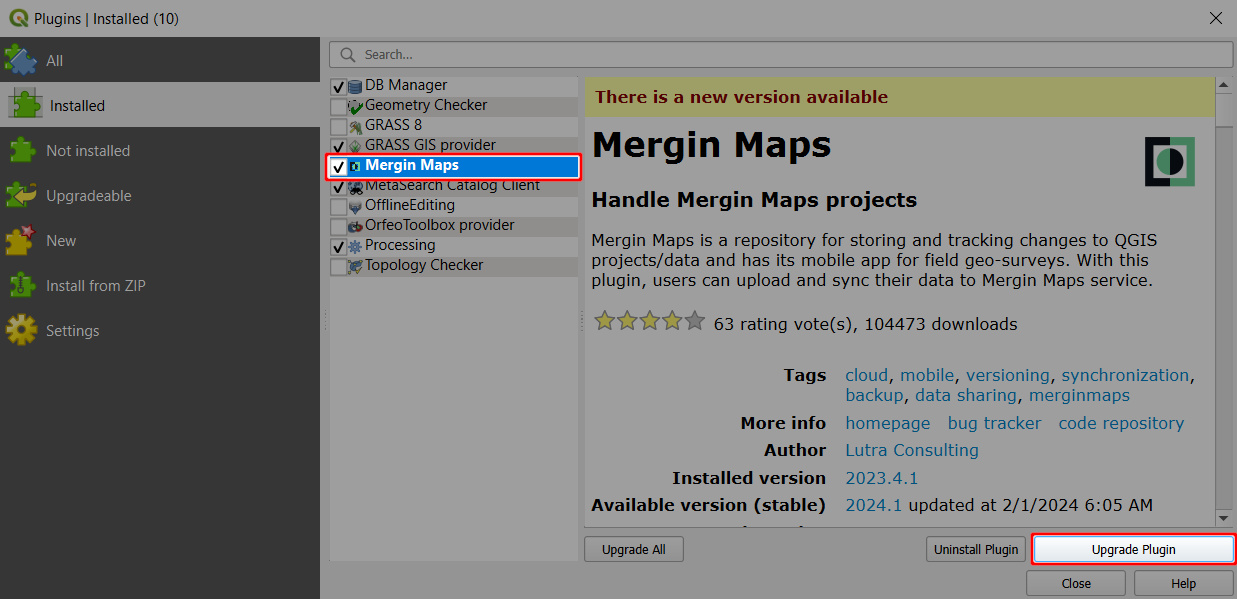
Find the Mergin Maps plugin. If there is a new version available, click Upgrade Plugin.
