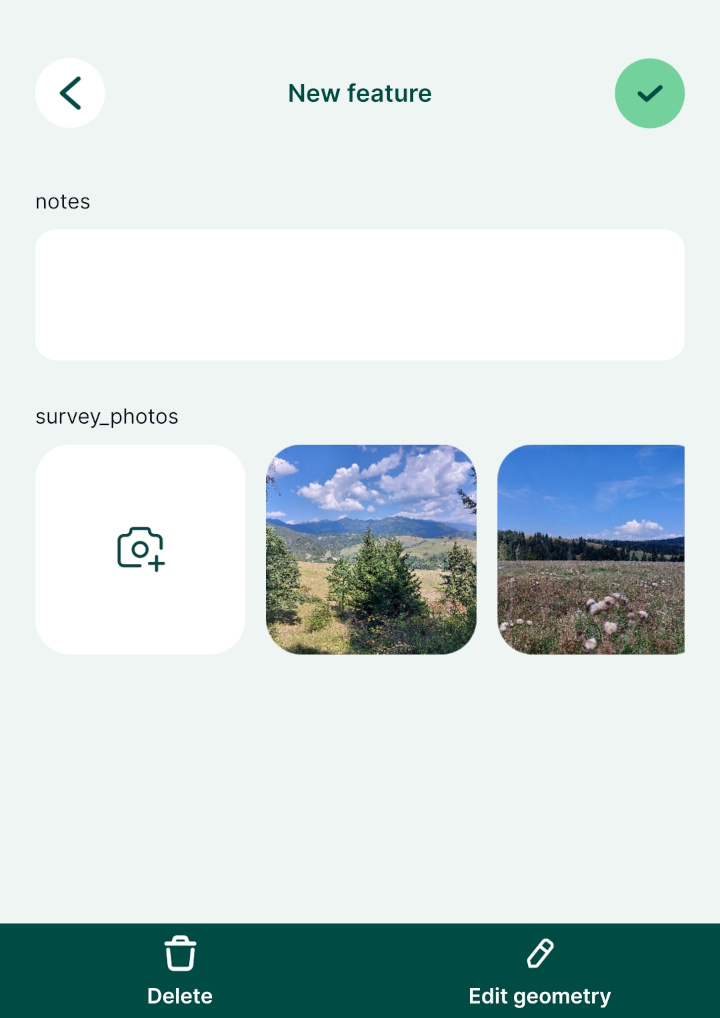
Appearance
Photos
Adding photos to a surveyed feature can be really helpful. With Mergin Maps, you can quickly take photos during the survey, share them with your team and store them in the cloud. You can either capture a photo using your camera or select existing photos from the gallery.
Mergin Maps offers some useful functionalities for capturing photos:- More than one photo can be attached to one feature. Follow our guide How to attach multiple photos to features to do so.
- Photos can be named automatically based on a customised names format.
- Synchronising photos during the field survey can use up a lot of mobile data, depending on the amount of pictures taken and their size. To reduce the data usage, you may use selective synchronisation, resizing pictures automatically or following the offline field survey workflow.
Widget | Preview in the mobile app |
|---|---|
| Single Photo | 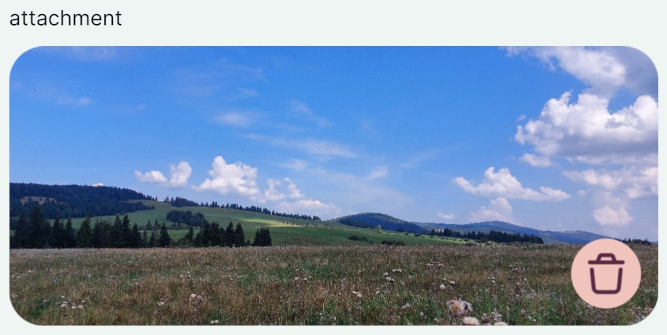 |
| Multiple Photos (Gallery) | 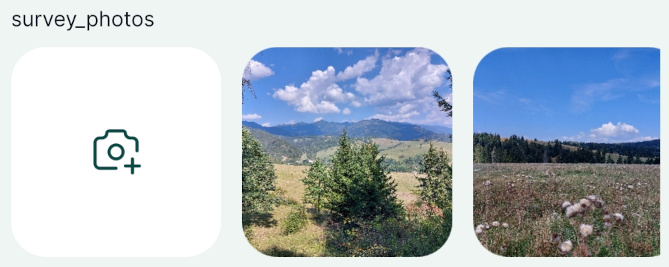 |
Example projects available
To see the basic attachment widget setup for photos, clone documentation/form_setup.
If you want to attach multiple photos to one feature explore the public project documentation/forms_multiple_photos.
Photo attachment widget in QGIS
Example project available
Clone documentation/form_setup to follow this example!
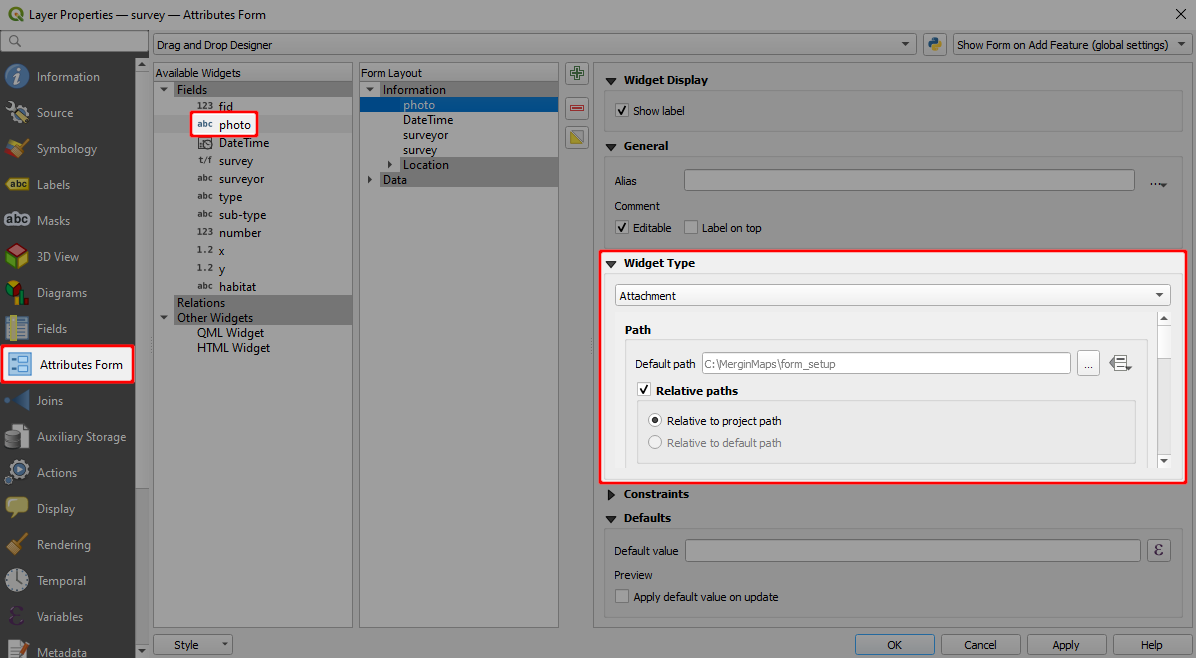
To add photos to features using the mobile app, the attributes form of a survey layer needs to have a field with data type Text (string) configured with the Attachment widget in QGIS as follows:
To set up the attachment widget:
Right-click on a layer, select Properties and go to the Attributes form tab.
In the list of Available Widgets select the text field you want to work with.
In the Widget Display tab:
- From the drop-down menu, select Attachment
- Default path defines where images will be saved. If it is not defined, the project home folder will be used.
- Store the path as Relative to project path or Relative to default path depending on how you want to store the paths.
Avoid using absolute paths
Using absolute paths causes issues when working with your projects on different devices or working in a team: as each device or team member can use different paths, they may be unable to display the images.
Apply the changes. Don't forget to save and sync your project!
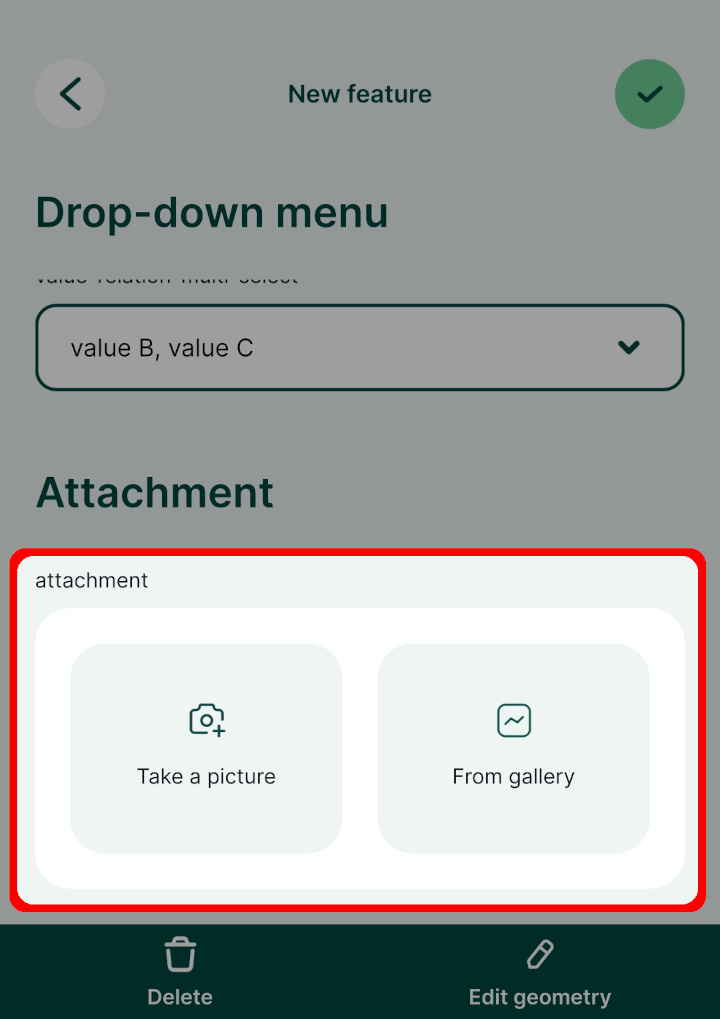
In the mobile app, this field will provide two options:
- Take a picture to use your camera app for taking a photos
- From gallery to attach an existing photo from your device
Custom folder for storing photos
It can be useful to set up a custom folder for photos, e.g. if you want to use selective synchronisation or if you simply want to have your data organised.
To set up a custom folder:
Create a subfolder in the project folder (here:
photos)Open your project in QGIS
Open the Properties of the survey layer and navigate to the Attributes form tab.
Select the field, where photos are stored (here:
photo) and make sure that the widget type is set to Attachment
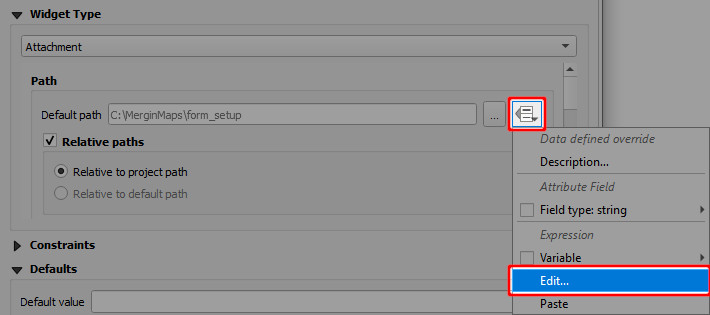
Now we need to change the Default path to the folder we have created. Click on the Data defined override icon and choose Edit...
In Expression String Builder enter the expression
@project_folder + '/photos'(replacephotosby the name of your folder). Click OK.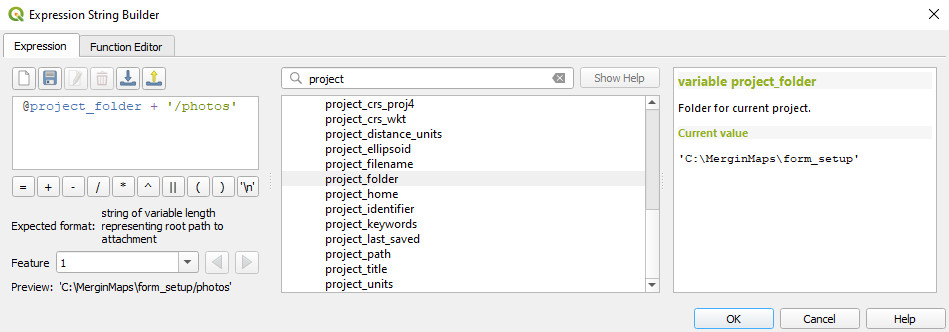
The Default path now refers to the custom folder.
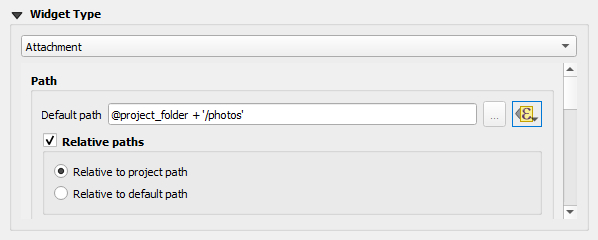
Apply the changes. Don't forget to save and sync your project!
Overview of paths for attachment widget
Here is an overview of paths that can be stored in various settings of the attachment widget.
| Default path | Store path as | Value |
|---|---|---|
| - | Relative to project path | image.jpg |
| - | Relative to default path | image.jpg |
@project_folder | Relative to project path | image.jpg |
@project_folder | Relative to default path | image.jpg |
@project_home + '/photos' | Relative to project path | /photos/image.jpg |
@project_home + '/photos' | Relative to default path | image.jpg |
Resizing pictures automatically
Photos that are captured during the field survey or uploaded using Mergin Maps mobile app can be automatically resized, e.g. to save up storage space. The quality of the photos can be set up in the Mergin Maps project properties using Mergin Maps QGIS plugin.
Customising photo name format with expressions
Photos taken in the field using Mergin Maps mobile app can be automatically renamed. This can be useful when browsing pictures in your Mergin Maps project and keeping them organised.
How to Set Photo Names Format will guide you through the setup and provide examples of expressions that can be used to name your photos.
Displaying photos in QGIS
Photos taken using Mergin Maps mobile app during the survey can be displayed in the feature's form in QGIS.
In QGIS, double click on a survey layer to open Layer Properties
In the Attributes Form tab, select the field that contains the path to the photo.
Scroll to the Integrated Document Viewer in the panel on the right. Set the Type to Image.
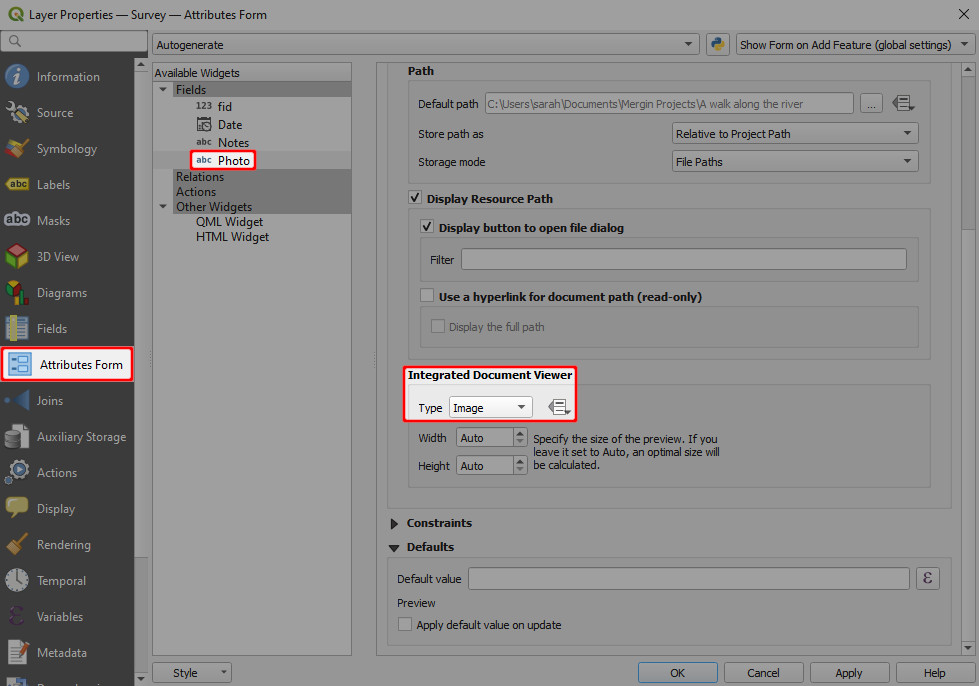
Apply the changes and click OK.
Now when you click on a feature that contains a photo, it will be displayed in the form.
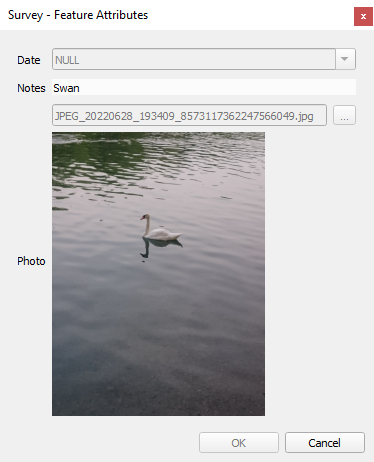
Image preview in QGIS
Some QGIS versions may not display the preview of the image correctly. This issue does not occur in mobile app. Therefore we recommend trying the setup by opening the form in the mobile app to make sure it works as intended.
Attaching multiple photos to one feature
In some situations, it might be useful to take more than one picture of a feature during the field survey. Attaching multiple photos to one feature is a one to many relation. You can read more about this topic in general in Relations.
Widget | Preview in the mobile app |
|---|---|
| Relation - Gallery |  |
Example project available
To see this setup in practice, you can download this public project documentation/forms_multiple_photos.
Non-spatial layer for storing photos
To link multiple photos to a single feature, we need to have a non-spatial layer (table) to store the paths to the photos.
Here we will create a new GeoPackage layer named
photoswith following attributes:photowithText (string)data type to store the photo pathexternal-pkwithText (string)data type to store the reference to the feature from the survey layer
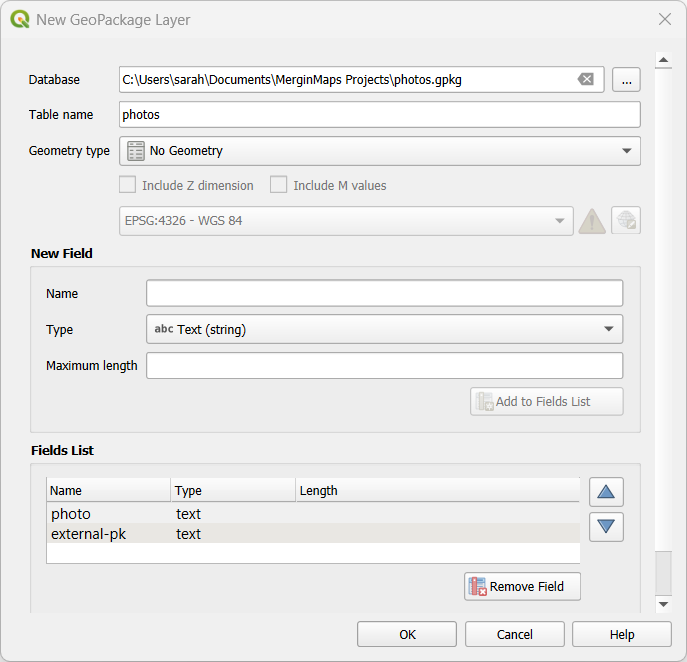
Using default values
You may add other attributes as needed, e.g. to record the username or dates automatically using default values.
Now we need to configure the attributes form: set the
photofield to store photo paths as described in the photo attachment widget.
Relation setup
The photos layer will be linked to the survey layer using an UUID: the survey layer needs to have a unique UUID field generated by the uuid() function (see how to set it up here) and the photos layer has a field to store the foreign key (here: external-pk).
Use UUIDs to link layers
Do not use the FID field to link these tables. FIDs can be changed during synchronisation, which can result in having photos linked to the incorrect feature. See Behind Data Synchronisation for more details.
You should always use unique UUIDs generated by the uuid() function to link layers as they do not change during the sync.
Navigate to the Relations tab in Project Properties and Add Relation as follows:
- Name is the name of the relation, can be left blank
- Referenced (parent) is the spatial layer
Survey - Field 1 of the Referenced (parent) is the field
unique-idthat contains the UUID - Referencing (child) is the non-spatial layer
photos - Field 1 of the Referencing (child) layer is the
external-pkthat contains the foreign key to link photos with surveyed features.
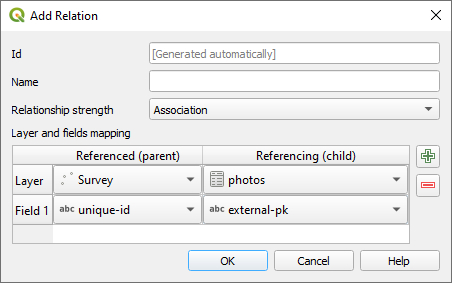
Relations widget (gallery) in the form
Check the Attributes form tab in the Layer Properties of your survey layer and make sure that the relation widget is included in the form.
If you use Drag and Drop Designer, you may need to add it to the form manually.
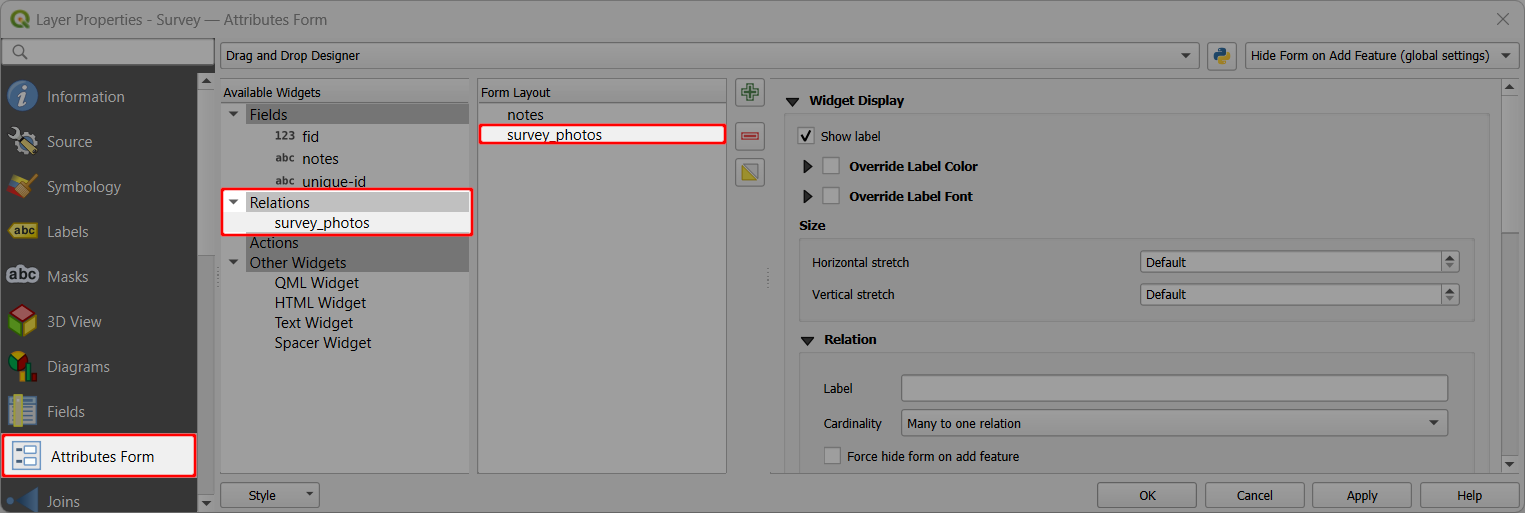
The mobile app detects the relation widget and allows to add multiple images to one feature, displaying them in a gallery form. 